OFF
Discounts are solely based on your group size. We do not add anyone to your group.
- Best Price Guarantee
- Hassle-Free Booking
- Team of highly experienced Experts
- Your Happiness Guaranteed
Book Now. No Booking or Credit Card Fee
- Schedule Your Own Dates
- Group Discounts
- Guaranteed Departures
- Easy Cancellation
- 60% Repeated Customers
-

- Duration
- 10 Days
-

- Transportation
- Helicopter flight
-

- Trip Grade
- Challenging
-

- Max-Altitude
- 6,461 meters
-

- Accomodation
- lodge during the trek
-

- Primary Activity
- Trekking, climbing
-

- Meals
- All meals during the trek
-

- Best Season
- Mar-May, Sep- Dec
-

- Distance
- 380 km
Overview
For climbers with limited time but big Himalayan ambitions, the 10-day Mera Peak Summit is one of the most efficient ways to stand at 6,461 meters and look Everest in the eye. It compresses what’s traditionally a 15–20-day expedition into a tight, well-supported Mera Peak 10 Days itinerary made possible largely by one key trick: flying out by helicopter after the summit instead of walking the long trail back down.
Climb Nepal’s highest trekking peak in just 10 unforgettable days by skipping lengthy permits, no three-week commitment, just a tightly engineered itinerary that gets you to the summit of Mera Peak (6,461m) and back to Kathmandu in record time. This trip is an excellent opportunity to climb one of the Himalayas’ most rewarding peaks with spectacular views of five 8,000m giants peaks such as Everest, Cho Oyu, Lhotse, Makalu, and Kanchenjunga. You can summit the peak without the technical demands of a full mountaineering expedition.
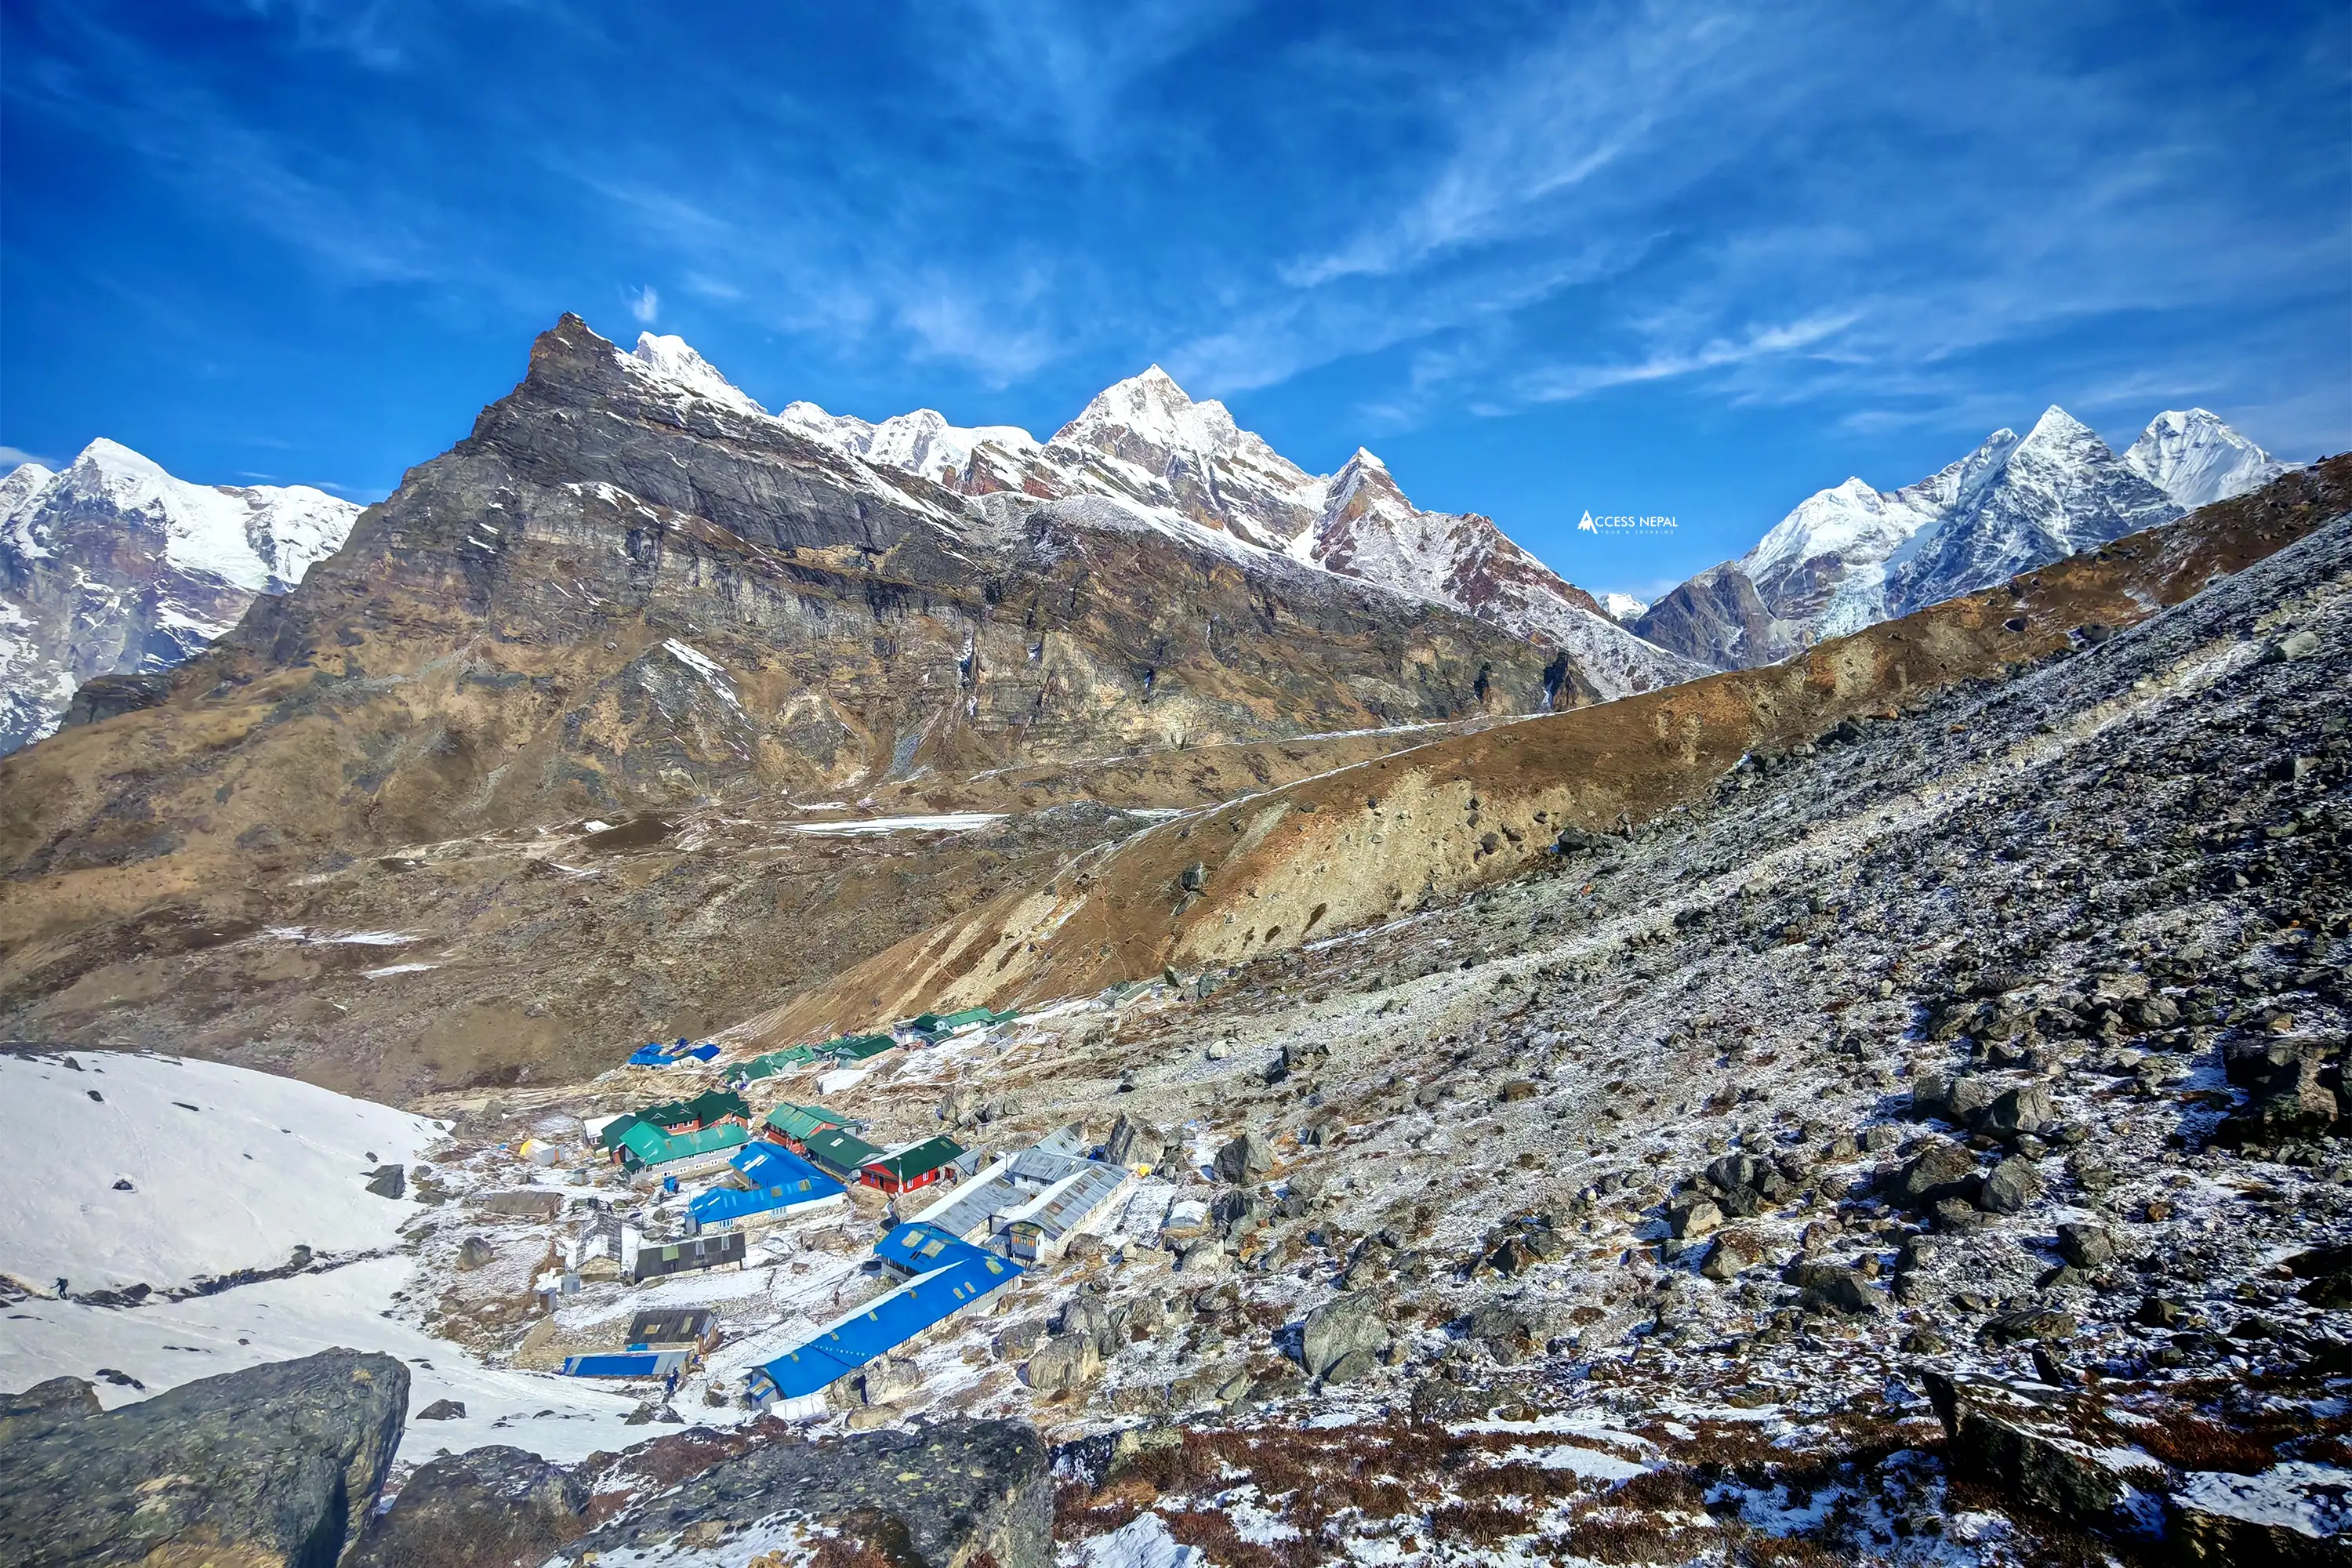
Your journey begins with a scenic, thrilling mountain flight to Lukla, gateway to the Khumbu region. Before the trail branches away from the busy Everest Base Camp route and into the wild, remote Hinku and Hunku valleys. Along the way, you’ll pass through traditional Sherpa villages marked by monasteries, chortens, and prayer flags, cross the dramatic Zatrwa La Pass, and walk beneath Mera Peak’s imposing north face before reaching Khare. Khare is Nepal’s highest altitude heaven before your final staging point for the climb.
From Khare, the expedition shifts into full mountaineering mode. The journey to Mera Peak summit consist of a full acclimatization day, a trek across the Mera Glacier to Base Camp, and a push to High Camp before the early-morning summit attempt.
Mera Peak is a non-technical climb because slopes never exceed roughly 30 degrees, and fixed ropes guide you safely to the top. It can be a preparatiorary climbing for an Everest Expedition, making it an ideal introduction to high-altitude mountaineering for climbers with solid fitness and trekking experience.
What makes this itinerary possible in just 10 days is the return journey, which is one of the most asked questions. Rather than retracing days of trail on tired legs, you’ll fly directly from Khare to Lukla by helicopter after summiting, then catch a short scenic flight back to Kathmandu. It’s a smart, efficient way to stand on top of a genuine Himalayan summit without needing three weeks of vacation time.
Mera Peak Summit Itinerary Highlights
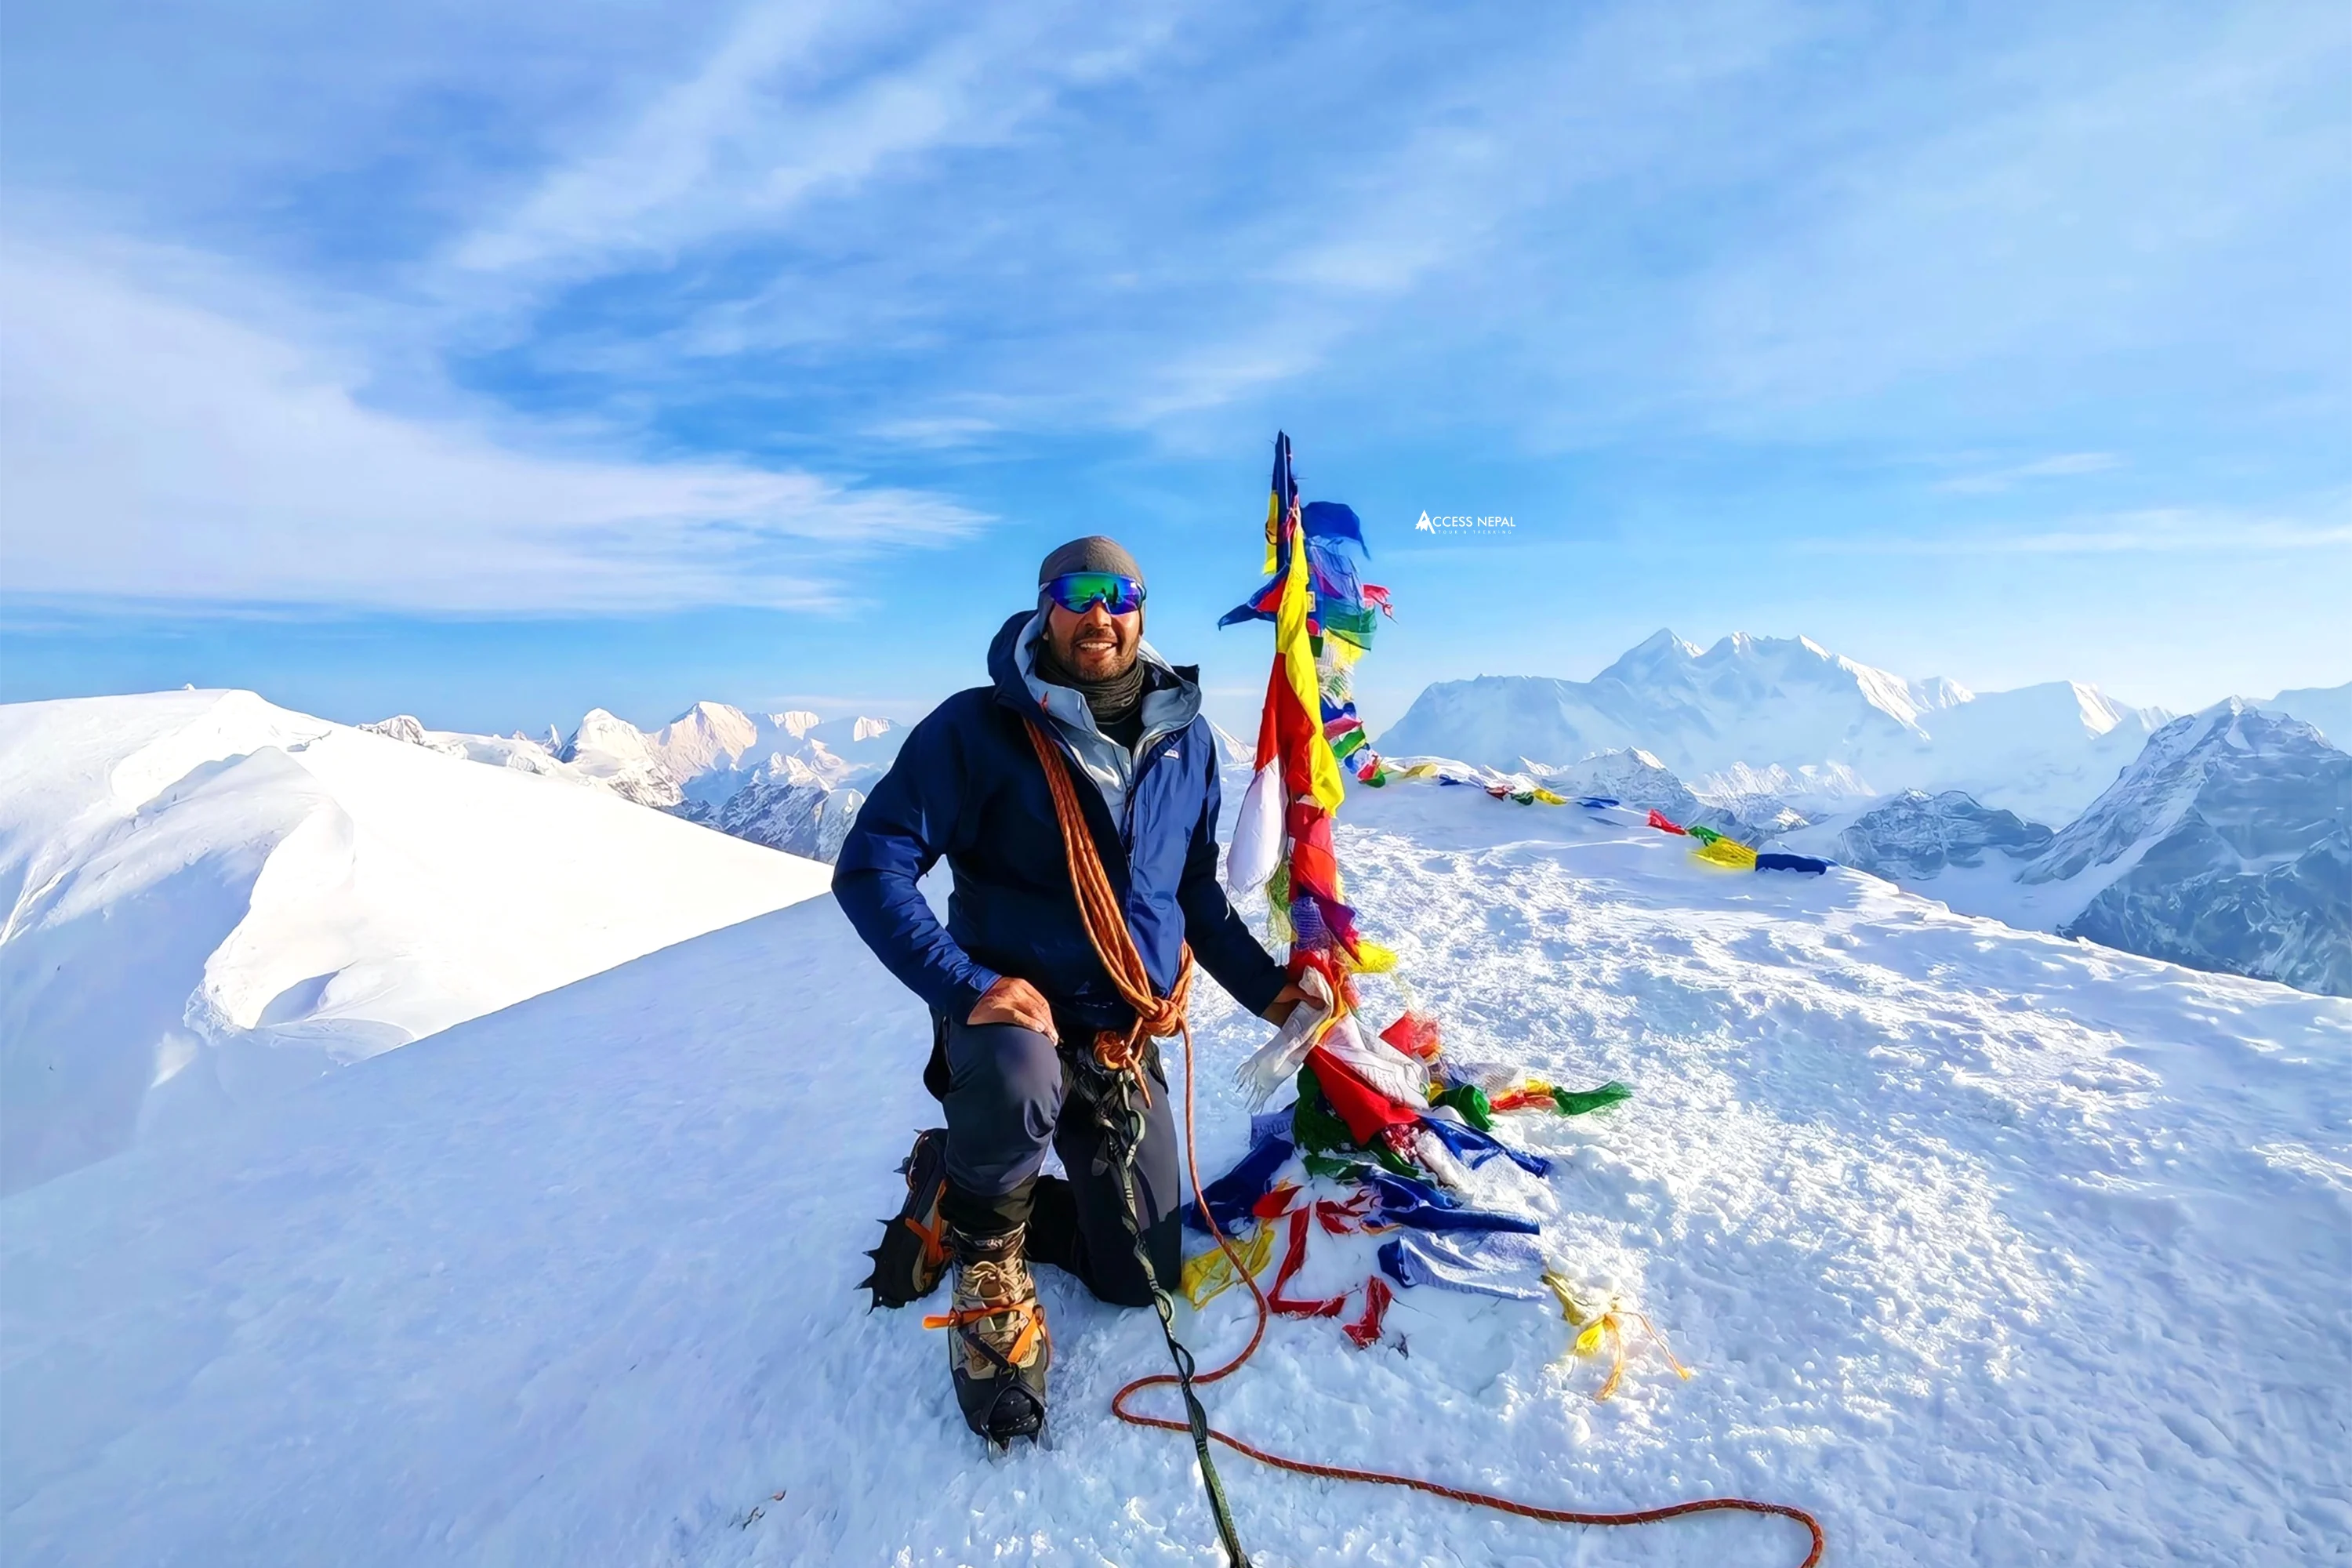
- Summit Mera Peak at 6,461m, the highest trekking peak in Nepal, with 360-degree views of five 8,000m giants Everest, Lhotse, Makalu, Cho Oyu, and Kanchenjunga
- Trek through the remote Hinku and Hunku valleys, far quieter and less-trekked than the main Everest Base Camp trail
- Cross Zatrwa La Pass (4,600m), with sweeping views of Numbur Himal, Kongde Ri, and Karyolung Peak
- Visit Lungsumgba Gompa, a roughly 200-year-old monastery where Mera Peak’s climbing route is carved directly into the rock
- Walk beneath Mera Peak’s dramatic North Face from Khare, your final village stop before the climb
- Cross the Mera Glacier on crampons, a genuine glacier-travel experience en route to Base Camp
- Fly out by helicopter straight from Khare to Lukla after summiting skipping days of walk-out trail and getting you home faster
- Full expedition support: licensed climbing guide, Sherpa porters, tented camp crew, daily pulse-oximeter health checks, and comprehensive first-aid backup
- No technical climbing experience required:fixed ropes and moderate slope angles make this an accessible first major summit for fit, motivated trekkers
- Round-trip scenic flights over the Himalayas, from Kathmandu to Lukla and back
Why Is the Mera Peak Summit by Helicopter Popular?
The standard Mera Peak climbing typically takes 15–20 days, most of that spent walking in through the Hinku Valley and then walking back out the same way.
The 10-day version keeps the same trekking-in route and climb, but swaps the long walk-out for a helicopter flight from Khare to Lukla after the summit; this reduces cutting several trekking days from the itinerary without compromising the acclimatization schedule needed to safely reach 6,461 meters.
This makes it a strong option for climbers who have the fitness and altitude tolerance for a serious summit push, but can’t commit three weeks of vacation time.
What Makes 10 Days Itinerary Different From the Standard Mera Peak Trek?
The Helicopter Shuttle Is the Real Innovation
Rather than retracing the entire Hinku Valley route on foot, which typically adds 4–5 extra trekking days. In the 10-day version flies climbers from Khare straight to Lukla immediately after the summit. This is the single change that makes fitting Mera Peak into a 10-day window possible without compressing the acclimatization schedule, which remains just as important as on the longer version.
Accommodation Shifts as You Climb
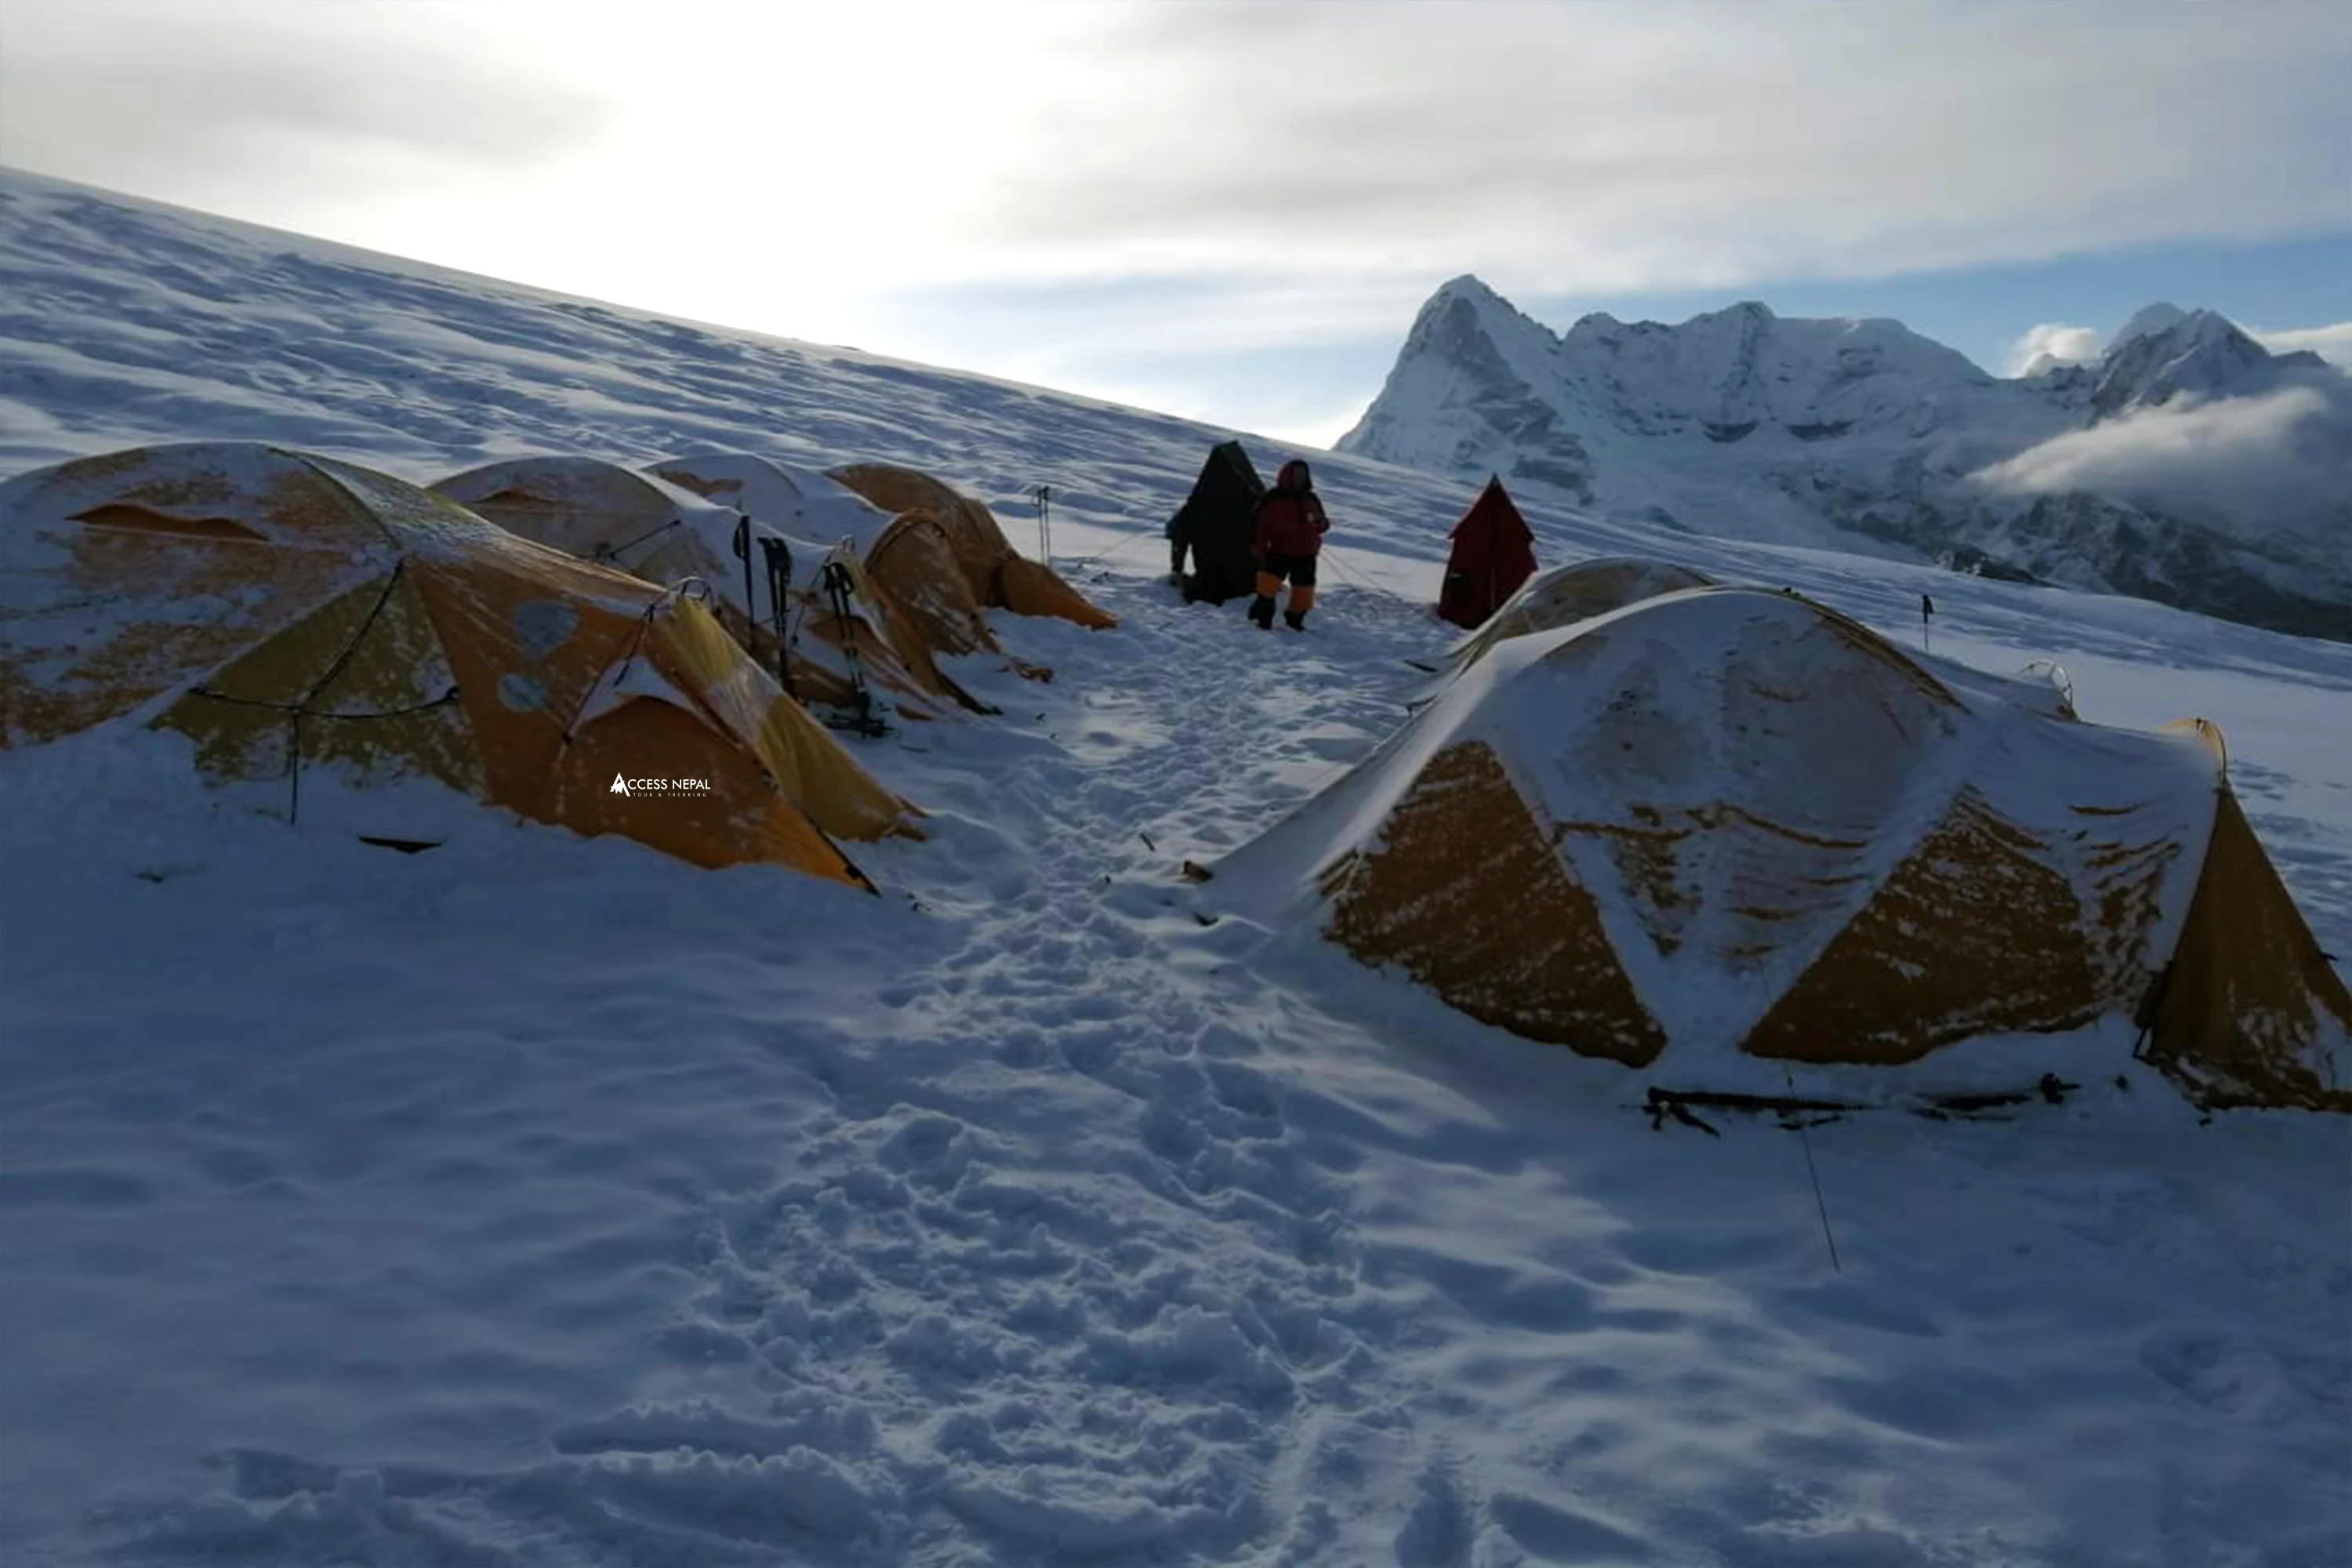
Expect teahouse lodging through Day 5 (Chhutang through Khare), then a shift to tented camp accommodation from Khare onward, run by a full support crew containing a cook, porters, and a climbing guide essential for the higher, more exposed sections of the route.
Non-Technical, But Not Easy
Mera Peak’s slopes don’t exceed roughly 30 degrees, and fixed ropes guide climbers to the summit, which is only the reason no advanced technical mountaineering is required. That said, altitude is the real opponent here; reaching 6,461 meters with reduced oxygen is physically demanding regardless of technical difficulty, which is exactly why the acclimatization day at Khare matters so much.
Mera Peak Summit Itinerary
Day 1Fly Kathmandu to Lukla, Trek to Chhutang
-
- 8 km
-
- 2,800 m
-
- 3–5 hours
-

- 2,800 m
Day 2Chhutang to Tuli Kharka via Zatrwa La Pass
-
- 11 km
-
- 4,600 m
-
- 5–6 hours
-
- 4,100 m
Day 3Tuli Kharka to Kothe
-
- 15 km
-
- 3,580 m
-
- 6–7 hours
-
- 3,580 m
Day 4Kothe to Thangnak
-
- 9 km
-
- 4,326 m
-
- 4–5 hours
-
- 4,326 m
Day 5Thangnak to Khare
-
- 5 km
-
- 5,000 m
-
- 3 hours
-
- 5,000 m
Day 6Acclimatization Day at Khare
-
- Short day hike
-
- 5,000 m
-
- Rest day
-
- 5,000 m
Day 7Khare to Mera Base Camp
-
- 5 km
-
- 5,300 m
-
- 5-6 horus
-
- 5,300 m
Day 8Mera Base Camp to Mera High Camp
-
- 3 km
-
- 5,700 m
-
- 2 hours
-
- 5,700 m
Day 9Summit Mera Peak, Descend to Khare, Helicopter to Lukla
-
- 10–12 km round trip
-
- 6,461 m (Summit)
-
- 8–9 hours
-
- 5,000 m
Day 10Fly Lukla to Kathmandu
-
- 1,350 m
-
- 30-minute flight
-

- 1,350 m
- Airport transfers, both arrival and departure
- Kathmandu–Lukla flight ticket (Day 1 ), including airport transfers and taxes (operates via Ramechhap–Lukla–Ramechhap from March to December)
- Helicopter transfer from Khare to Lukla following the summit (Day 10)
- 7 nights in twin-sharing teahouse accommodation (Chhutang to Khare)
- 2–3 nights in a fully equipped tented camp at Khare, Mera Base Camp, and Mera High Camp — windproof and waterproof twin-share tents, dining tent, kitchen gear, dining tables and chairs, and toilet tents
- All standard meals (breakfast, lunch, and dinner) throughout the trek, plus tea and seasonal fruits at every meal during teahouse stay
- Makalu Barun National Park entry permit
- TIMS (Trekkers’ Information Management System) card
- Mera Peak Climbing Permit (NMA)
- Khumbu Pasang Lhamu Rural Municipality permit
- An experienced, first-aid trained, government-licensed, English-speaking climbing guide
- A climbing Sherpa accompanying you from Khare to the summit and back — one guide per two clients, with additional guides added for larger groups
- Porters carrying your luggage throughout the trek — one porter per two clients
- Full wages, accommodation, meals, gear, insurance, and medication coverage for all staff members
- All group climbing equipment, including ropes, ice screws, snow bars, and ice axes
- 4-season down jacket, sleeping bag, and duffel bag available on a rental basis, if required
- Daily pulse oximeter checks to monitor for altitude sickness
- Comprehensive first-aid kit carried throughout the trek
- Adventure certificate upon successful completion of the trek
- All administrative expenses and government taxes
- Nepal visa — obtainable on arrival at Tribhuvan International Airport (USD 50 for 30 days, USD 125 for 90 days)
- International flights to and from Nepal
- Travel insurance covering helicopter evacuation, medical expenses, and trip cancellation
- Hotel accommodation and meals in Kathmandu (before Day 1 and after Day 10)
- Hot showers and electronic device charging at teahouses
- Extra porter costs, Wi-Fi, and additional meals beyond those included
- Excess baggage charges on Lukla flights (10–15 kg included, depending on operator)
- Tips for your guide, porters, and driver, etc
Fixed Departure
Our groups are small with maximum 14 people. We create groups of independent travelers, friends and families which maintains close interpersonal connection, engage more and get into depth of the journey. Choose a date from the calendar to reserve your spot.
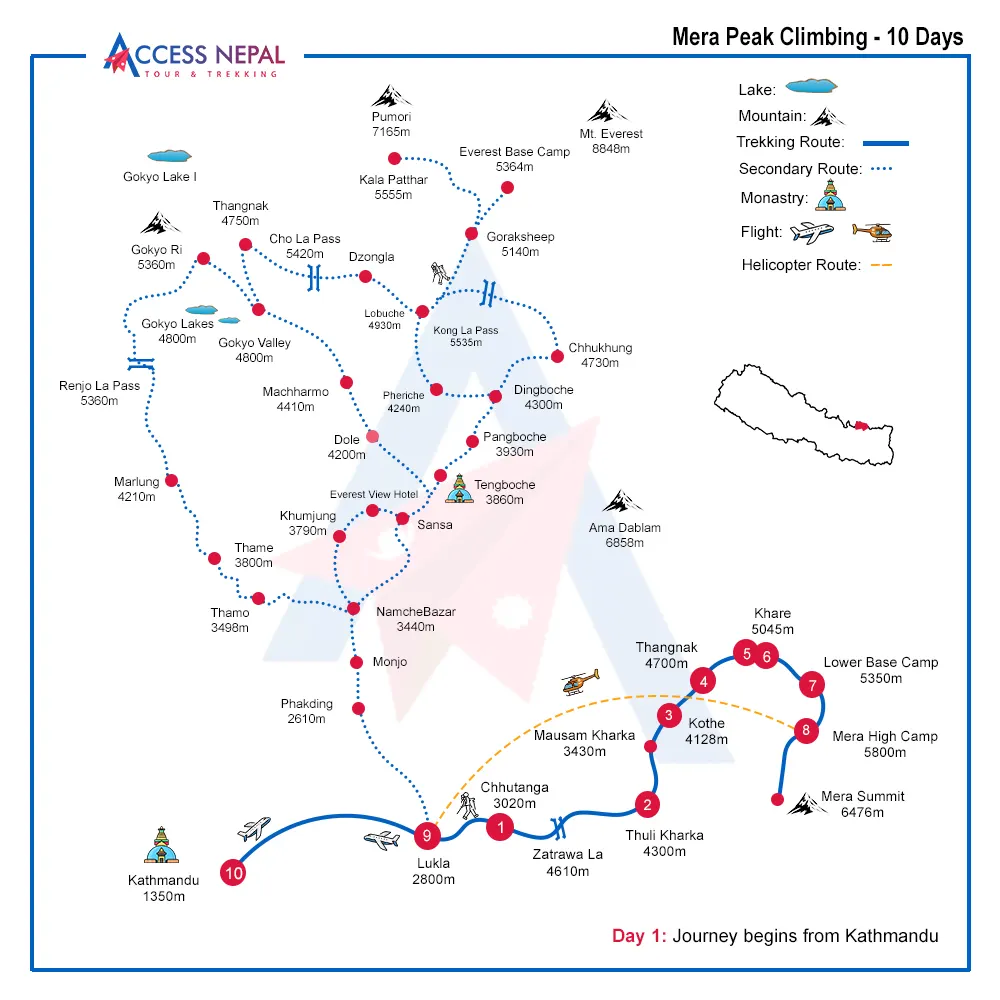
Mera Peak Summit Route Map
Altitude Chart
Useful Information
Mera Peak Facts: The Mountain With Three Faces
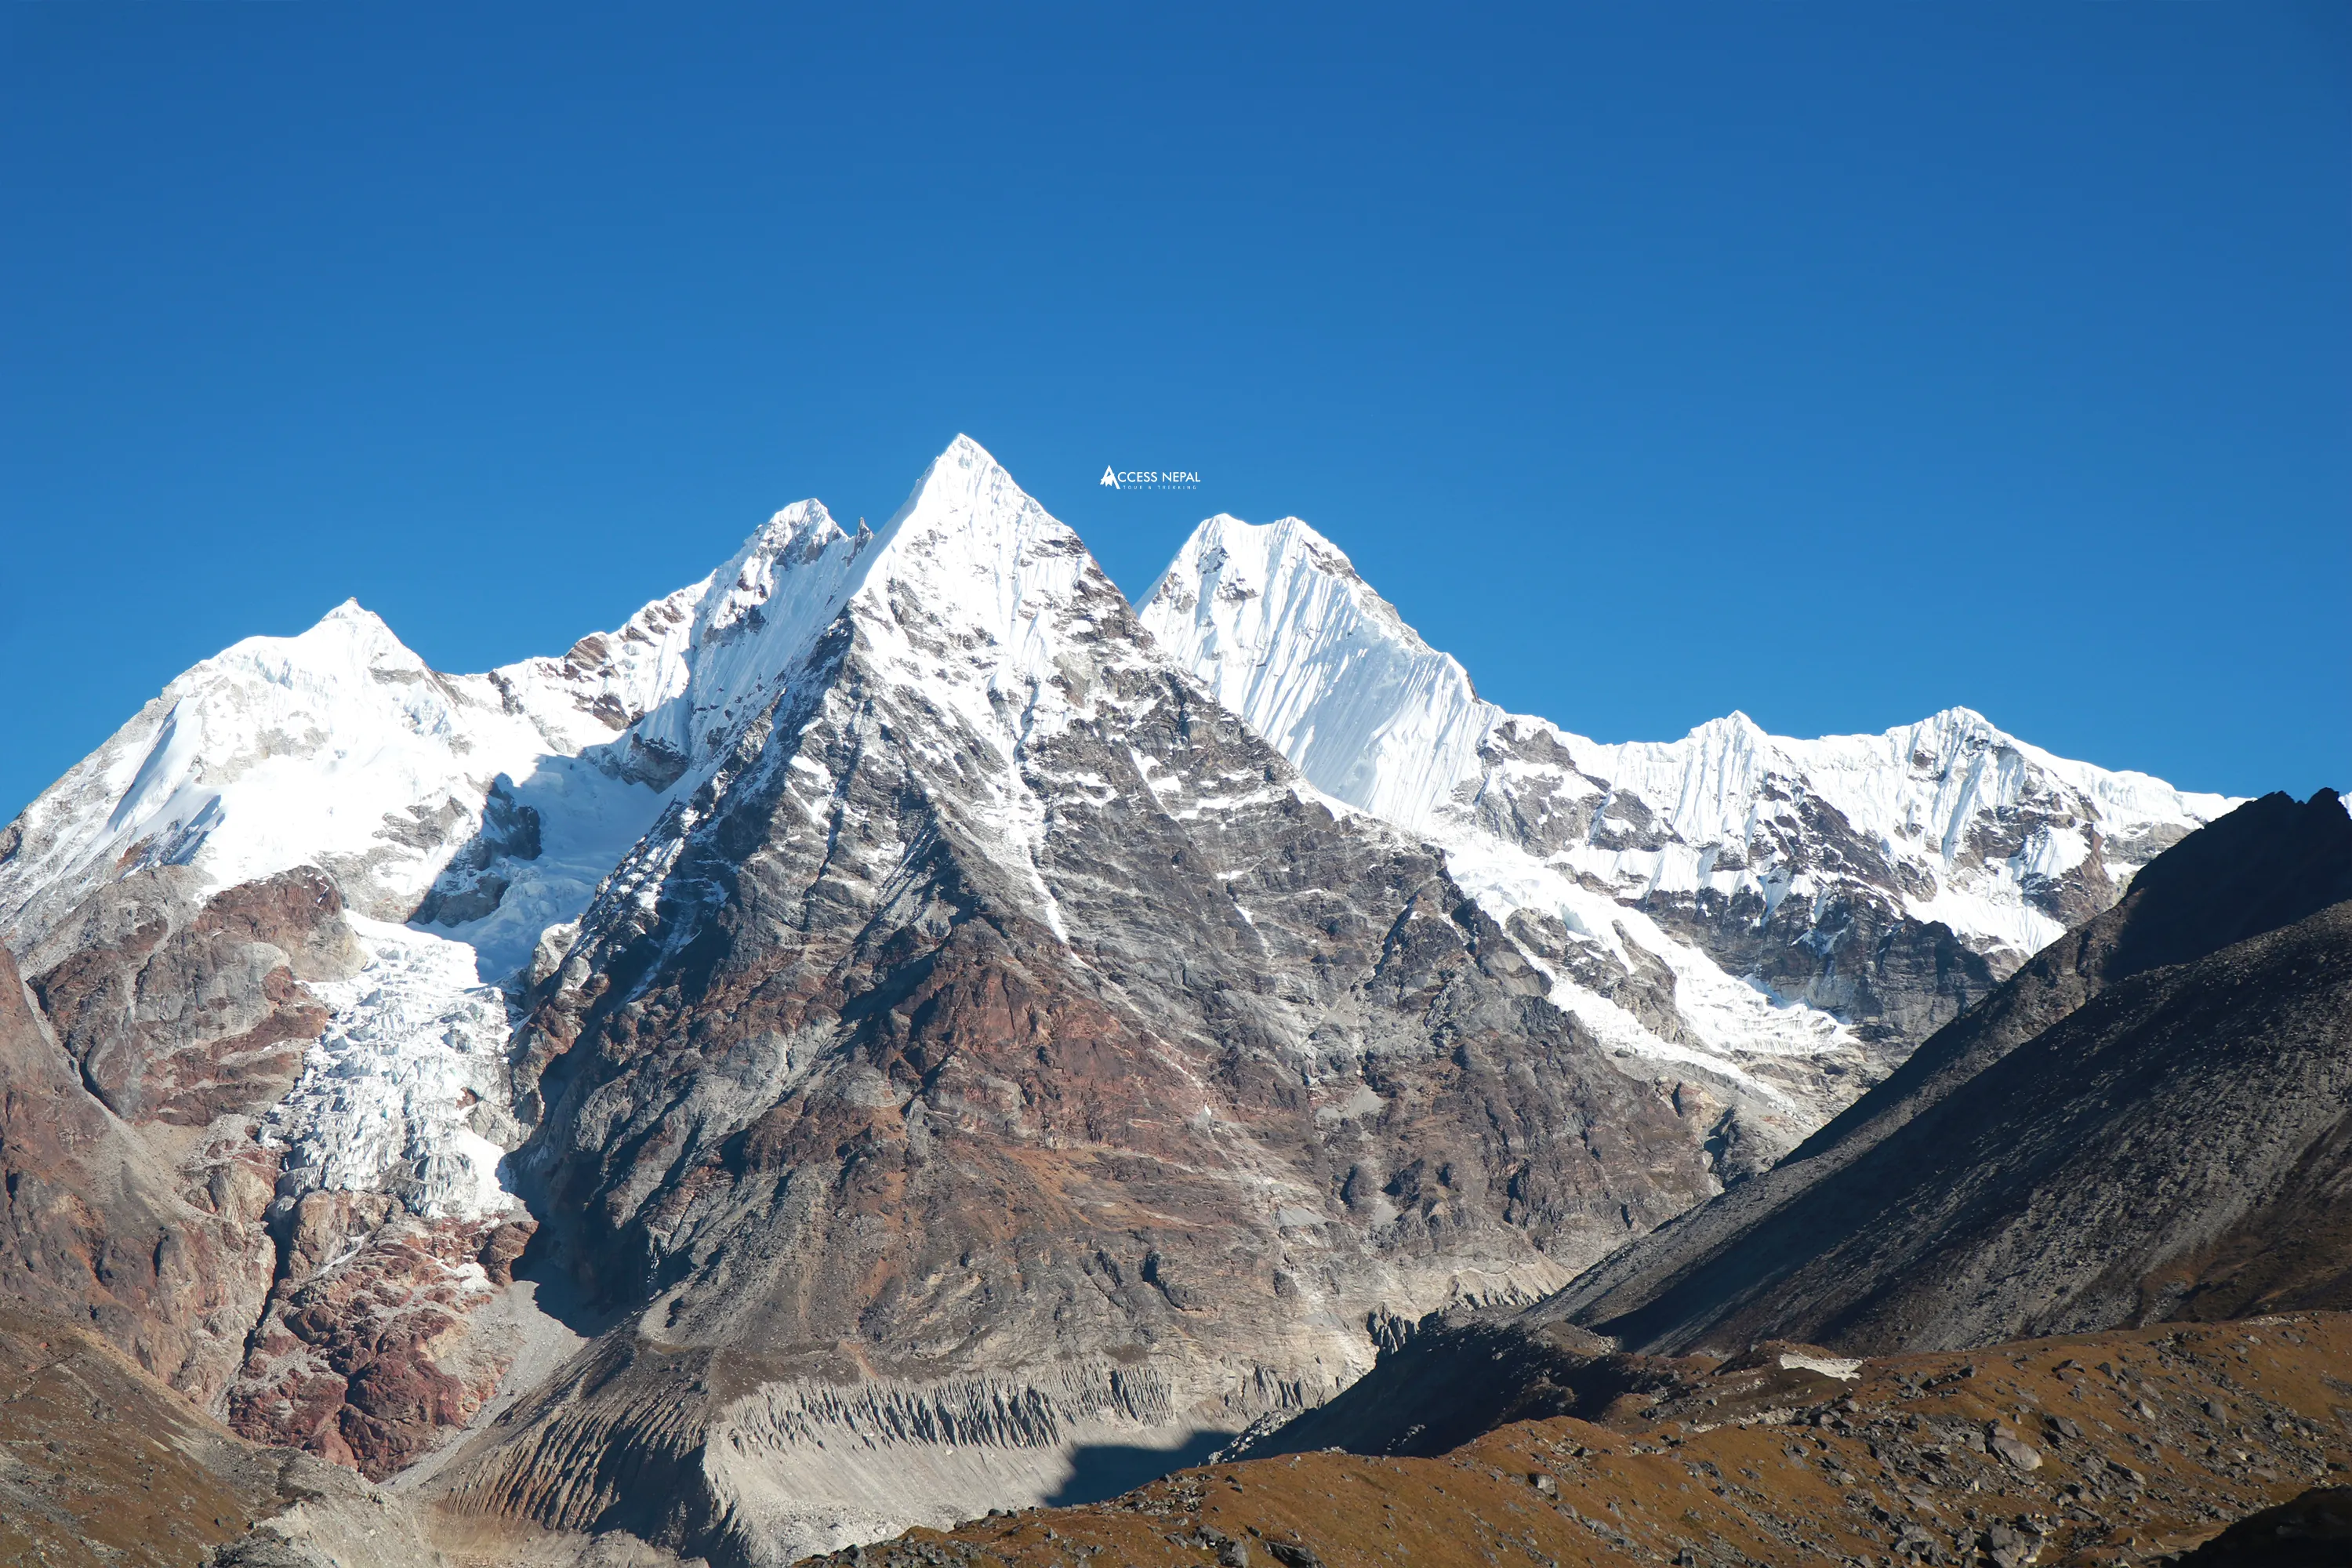
Deep in the Mahalangur Himal, in a lesser-known corner of the range called the Barun sub-section, a mountain rises out of the Sankhuwasabha district of Nepal’s Sagarmatha Zone, and it does not have only one summit; it has three faces.
Most climbers who set off toward Mera Peak picture a single triumphant point at the top, a place where all trails converge into one final push. But Mera isn’t built that way. It’s a mountain of three distinct personalities, rising side by side along the same massif, each with its own character and its own claim to the sky.
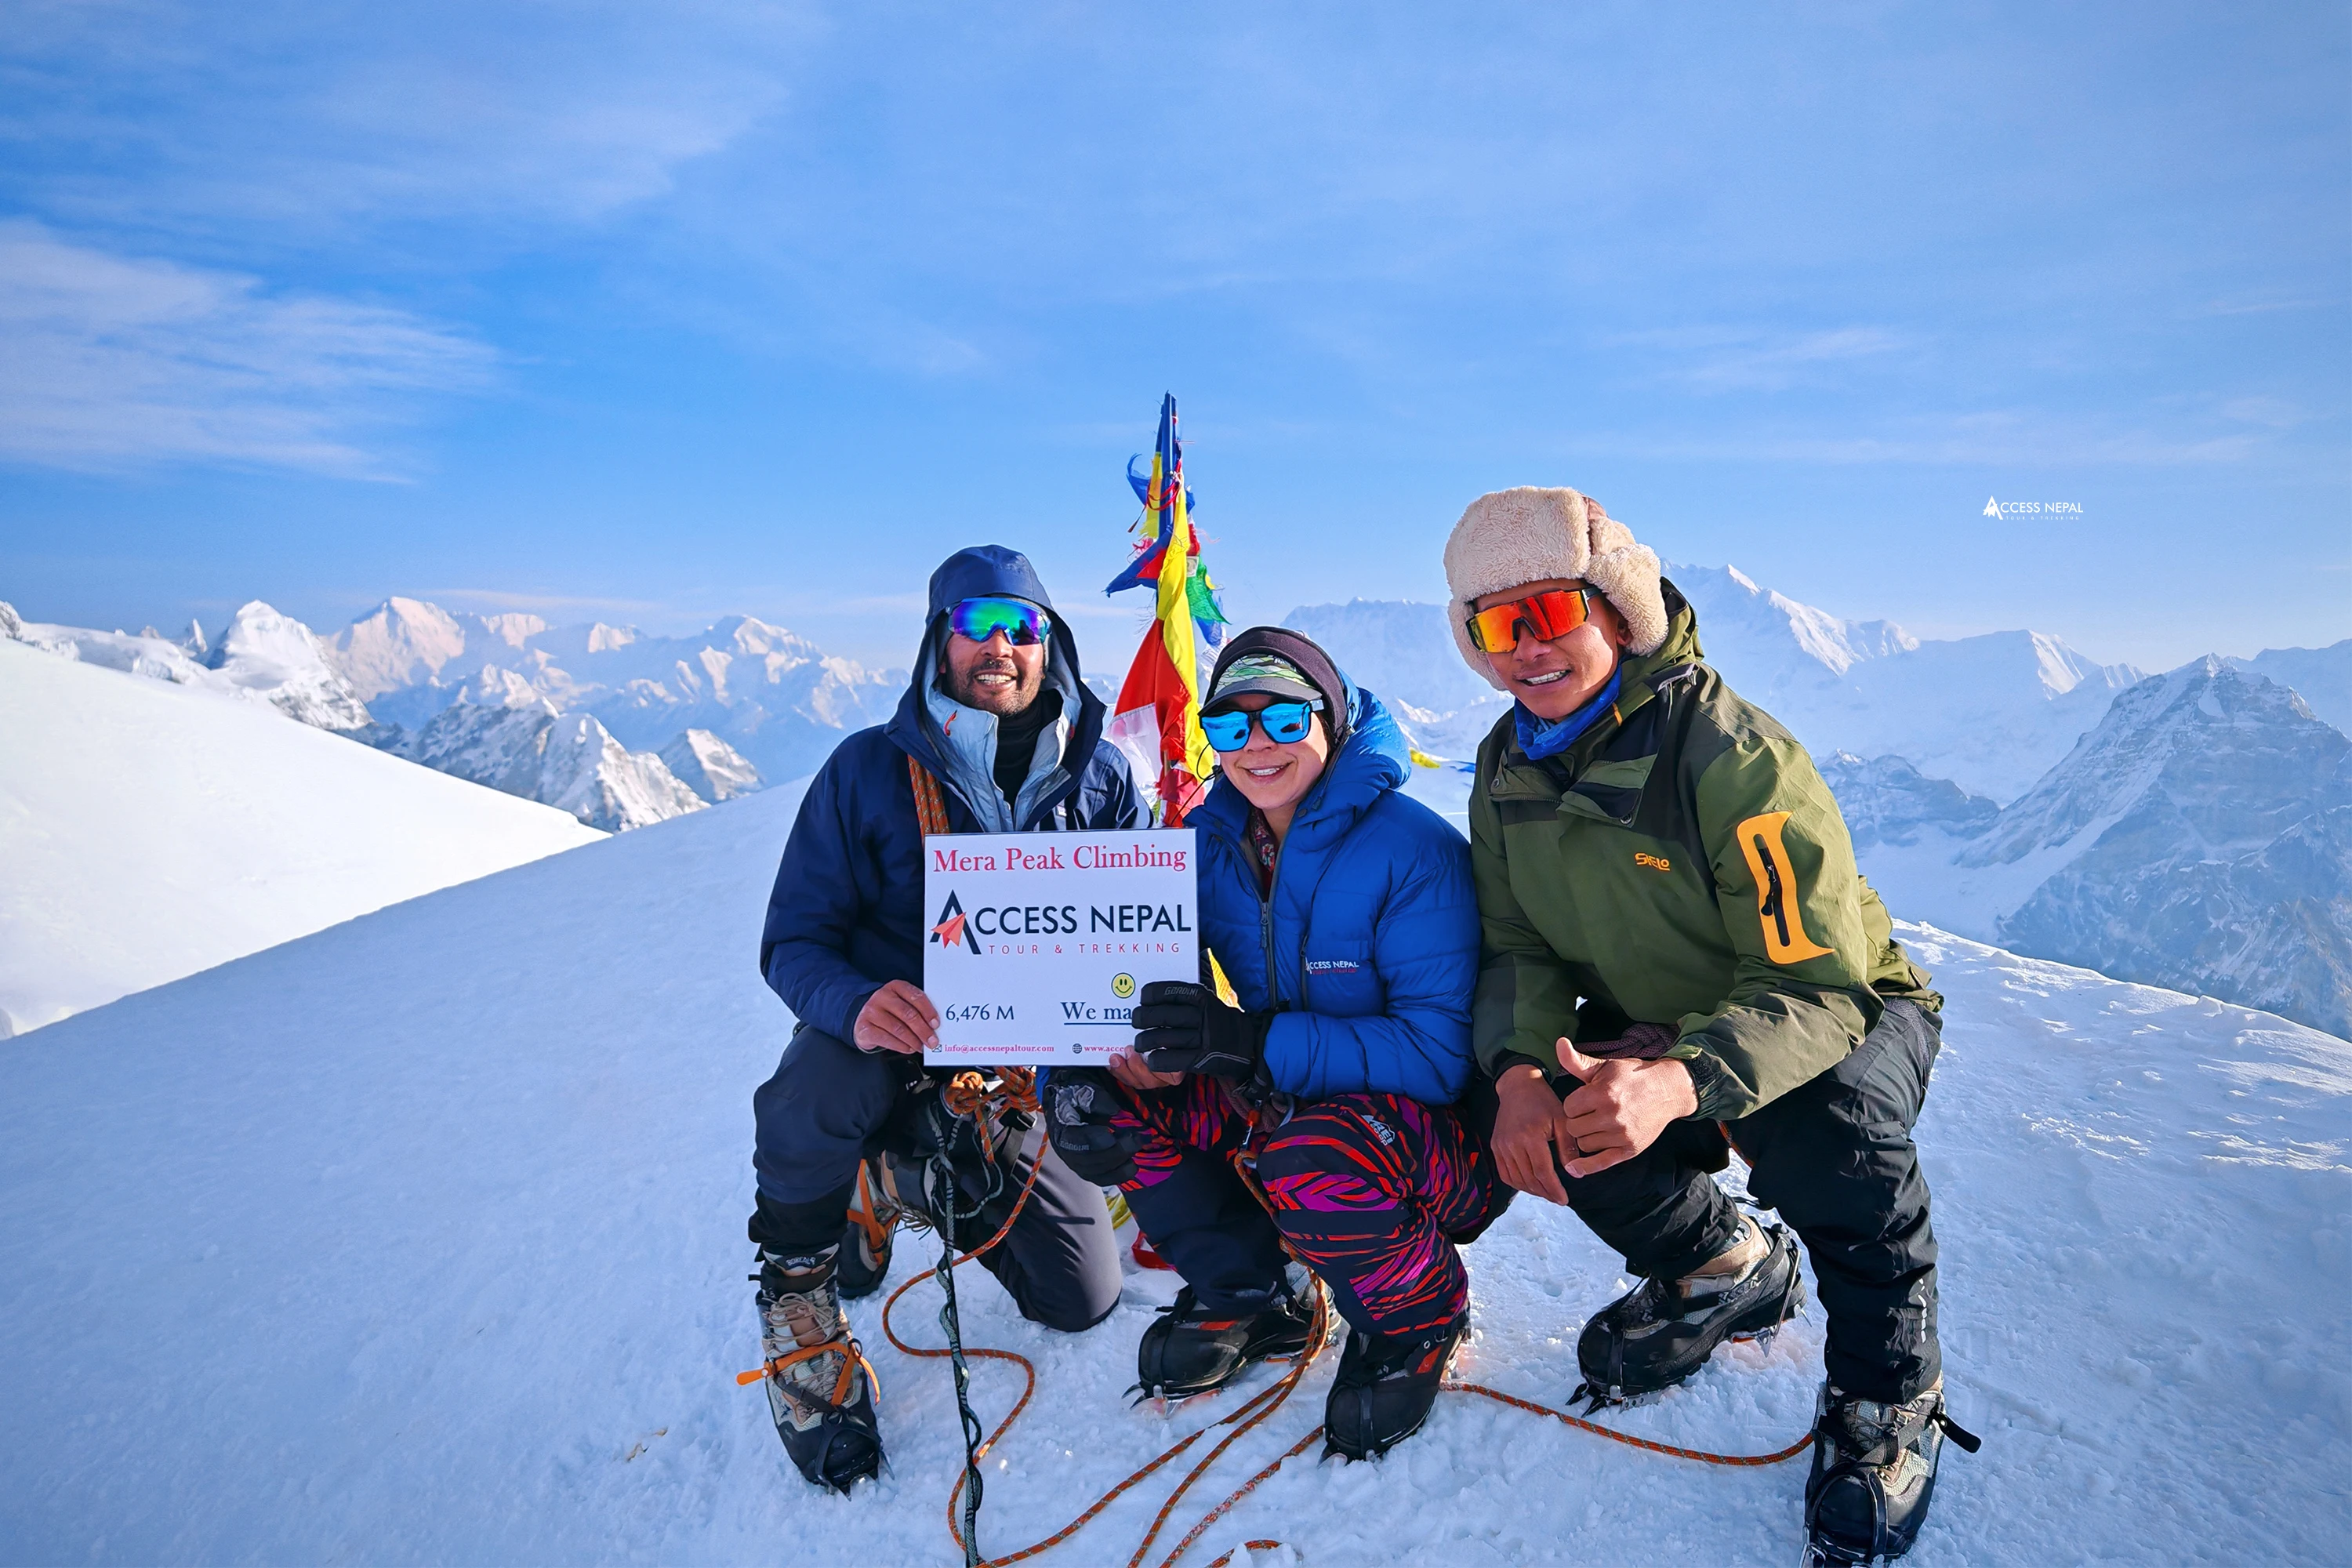
Among the three different faces, Mera North stands tallest of the three, reaching 6,476 meters, which is the true high point of the mountain, though the least visited of the summits. Mera Central, at 6,461 meters, is the one almost every climber actually stands on; it’s the classic route, the one carved into the ancient rock at Lungsumgba Gompa, the summit most operators build their itineraries around. And Mera South, the gentlest of the three at 6,065 meters, rounds out the trio.
Look closely from the southern approach, and there’s even a fourth, smaller shape which is not an unofficial “trekking summit” that barely registers on most maps, a quiet footnote to the mountain’s main story.
Officially, Mera is classified as a trekking peak, which means it opens its slopes to climbers without demanding the full weight of a mountaineering expedition. No extreme technical skill required, just fitness, patience, and respect for the altitude. It’s part of what makes Mera such a beloved rite of passage into high-altitude climbing.
But here’s where the mountain’s story takes an unexpected turn, one that even seasoned trekkers rarely know.
For years, Mera Peak has been marketed with a height of 6,654 meters, and crowned, again and again, as “the highest trekking peak in Nepal.” It’s a claim that’s been repeated on countless blogs, brochures, and booking pages confident, specific, and almost entirely wrong.
That figure, and the coordinates that came with it, never belonged to Mera at all. They belonged to a neighboring mountain called Peak 41.
Somewhere back in the early cataloguing of Himalayan peaks, a mistake was made. Peak 41’s elevation was mistakenly filed under Mera’s name. And once an error like that finds its way into an official list, it rarely gets corrected. It simply gets copied. Different trek operator to trek operator, brochure to brochure, from blog to blog, the wrong number and the wrong coordinates traveled forward in time, unquestioned, for years.
So the next time you see Mera Peak advertised at 6,654 meters, you’re looking at a small piece of Himalayan folklore hiding inside what looks like a hard fact a borrowed number from a mountain standing quietly nearby, never quite given the correction it deserved.
The real Mera, the one climbers actually reach, tops out closer to 6,461 – 6,476 meters, depending on which of its three summits you’re standing on. And perhaps that’s fitting for a mountain this layered; even its height refuses to be told as a single, simple number.
Best Time to do Mera Peak Itinerary 10 Days
Timing your Mera Peak Summit isn’t just a scheduling detail. It directly affects your safety, your summit odds, and what you’ll actually see once you get there. Here’s how each season stacks up.
Spring (March–May): The Classic Choice
Spring is one of the two prime windows for Mera Peak, and for good reason. As winter tapers off, the mountains hold onto fresh snow cover well into March and April, giving the entire route a crisp, classic Himalayan look, with every peak in the panorama capped in white.
What to expect on Meara Peak Summit 10 days?
- Stable, settled weather with generally clear skies
- Fresh snow on higher sections, especially in March and April (this also happens to be ski season in the region)
- Warming daytime temperatures as the season progresses toward May
- Rhododendron blooms lower down the trail, adding color to the forested sections
Why Spring (March–May) is good? Conditions are close to ideal for both safety and scenery as well as good visibility for summit views, manageable weather patterns, and trails that are neither frozen solid nor turned to mud.
Autumn (September- November): The Other Prime Window
Autumn is widely considered the single best season to summit Mera Peak, often edging out spring in terms of consistency.
What to expect on Autumn (Septemberv- November)?
- The clearest, most stable weather of the year
- Excellent visibility for the summit panorama of Everest, Lhotse, Makalu, Cho Oyu, and Kanchenjunga all sharply visible
- Comfortable daytime trekking temperatures, with cold but manageable nights at altitude
- Post-monsoon trails that have dried out and firmed up
Why it works: This is peak trekking season across Nepal because the monsoon has cleared the air of haze and dust, leaving some of the sharpest mountain views of the entire year. If you can only pick one season, most guides will point you here.
Winter (December – February): For Experienced Climbers Only
Winter Mera Peak Summit is possible, but it’s a genuinely different and harder experience.
What to expect:
- Heavier snow accumulation, making trail navigation more physically demanding
- Noticeably shorter daylight hours, requiring tighter time management on trekking and summit days
- Colder temperatures throughout, meaning heavier clothing and gear loads
- Dramatically fewer climbers on the trail a serene, near-solitary experience
- Some of the most striking snow-covered scenery of the year, if you’re prepared for it
Why it’s different: Winter isn’t recommended for first-time high-altitude climbers. It rewards those who already understand winter mountaineering, deep snow travel, cold-weather technical skills, and the judgment to manage a shorter climbing window each day. If you’re experienced and craving solitude, though, this season delivers scenery few others get to see.
Monsoon / Summer (June–August): Generally Avoided
Monsoon / Summer (June–August) is the one season most operators will actively steer you away from.
What to expect:
- Frequent rainfall, with skies often blanketed in rain clouds
- Muddy, slippery lower trails, and increased landslide risk on approach routes
- Reduced visibility for much of the trip, though rain does have one upside — it clears dust from the air, occasionally producing striking, if brief, clear-sky moments
- Higher humidity, meaning clothing and gear dry out slowly
Why it’s risky: Between the slippery terrain and unpredictable visibility, monsoon season adds real difficulty on top of what’s already a demanding climb. Some very experienced climbers do still attempt it with extra preparation, but it’s not where most trekking agencies will recommend a first Mera Peak attempt.
Mera Peak Weather and Temperature by Month
Season names like “spring” and “autumn” only tell part of the story — actual conditions shift meaningfully month to month. Since Mera Peak’s approach starts in Lukla before climbing much higher, here’s what to expect at each stage of the year, using Lukla (2,860m) as the reference baseline; temperatures drop significantly further as you climb toward Khare and the summit.
| Month | Day Temperature: Lukla | Night Temperature: Lukla | Rainfall/Snowfall | Trail Conditions |
| January | ~1°C | -13°C to -15°C | Low (dry season) | Very cold, quiet trails, possible snow at altitude |
| February | ~2–4°C | -12°C to -14°C | Low | Cold but stable, fewer crowds |
| March | ~5–7°C | -11°C to -12°C | Low–moderate, increasing snow at altitude | Early spring, improving conditions |
| April | ~8–10°C | -8°C to -10°C | Moderate | Good visibility, warming trend |
| May | ~10–12°C | -5°C to -8°C | Increasing, pre-monsoon showers | Warmest of spring, occasional afternoon cloud |
| June | ~12–14°C | 0°C to -3°C | Rising sharply (monsoon onset) | Humid, increasing rain |
| July | ~13–14°C | 5°C to 8°C | Highest of the year (300mm+) | Heavy rain, leeches, landslide risk, muddy trails |
| August | ~13°C | 5°C to 7°C | Very high, most rainy days of the year | Peak monsoon, poor visibility |
| September | ~10–12°C | 0°C to 3°C | Tapering off through the month | Improving rapidly by late month |
| October | ~8–10°C | -3°C to -5°C | Low | Clearest skies of the year, peak season |
| November | ~5–7°C | -6°C to -9°C | Very low (driest month) | Excellent visibility, cold nights, still busy |
| December | ~2–4°C | -10°C to -13°C | Low | Cold, quiet, occasional early snow |
Key Takeaways by Season for Mera Peak Itinerary 10 Days
Driest months: November and December see the least rainfall of the year, though December brings noticeably colder nights.
Wettest months: July and August are Nepal’s monsoon peak — heavy, near-daily rain, muddy trails below Namche, and the highest flight-delay risk of the year.
Best visibility: October and November consistently offer the clearest mountain views, which is exactly why autumn is peak trekking season across the Khumbu.
Coldest months: January carries the lowest nighttime temperatures, with conditions at Khare and High Camp dropping considerably further below these Lukla baseline figures.
Remember the altitude gradient: these figures are for Lukla at 2,860m. By the time you reach Khare (5,000m) or High Camp (5,700m), expect temperatures 15–25°C colder than what’s shown here, especially overnight.
Accommodation on Mera Peak: From Teahouses to Mountain Tents
Where you sleep on the Mera Peak trek changes almost as much as the landscape around you. In the lower valleys, you’ll find warm, welcoming teahouses run by local families. By the time you reach the high camps, you’re sleeping in a tent on snow, with nothing between you and the mountain but canvas and a good sleeping bag. Here’s what that journey actually looks like, stop by stop.
Lower Villages: Simple Teahouses (Chhutang to Kothe)
The first few nights of the trek are spent in classic Himalayan teahouses — small, family-run lodges built from stone and timber, tucked into forested hillsides along the Hinku Valley trail.
What to expect:
- Basic twin-share rooms with a wooden bed frame, a thin mattress, and a pillow bring your own sleeping bag for warmth
- Shared bathrooms, usually squat-style, sometimes with a bucket shower available for a small extra fee
- A cozy communal dining hall, often warmed by a wood or dung stove in the evening this is where trekkers, guides, and porters gather to eat, chat, and thaw out
- Simple but genuinely home-cooked meals like dal bhat, noodle soups, and basic breakfast items
- Walls are thin, so don’t expect much privacy or soundproofing, but the atmosphere makes up for it
These early nights feel more like staying with a local family than checking into a hotel, and for many trekkers, they’re some of the warmest, most memorable stops of the whole trip.
Mid-Route: Basic Mountain Lodges (Thangnak to Khare)
As you climb higher and villages grow sparser, the lodges become noticeably more basic — smaller, colder, and more functional than comfortable.
What to expect:
- Thinner walls, colder rooms, and less insulation as elevation rises
- Fewer amenities hot showers become rare or unavailable, and charging your phone often costs extra (if it’s offered at all)
- Menus shrink to a handful of hearty, high-energy options rather than the wider variety found lower down
- Rooms are still twin-share, though at this altitude you’ll be grateful for a proper sleeping bag rather than relying on the lodge’s blankets
- A noticeably quieter, more remote feel; fewer trekkers pass through this stretch of the route
By the time you reach Khare, at 5,000 meters, you’ll notice the shift most clearly. This is the last stop with any kind of built accommodation; everything beyond here is tented.
High Camps: Tented Accommodation (Khare, Base Camp, High Camp)
Once the trek turns into a full climbing expedition, teahouses disappear entirely. From Khare onward, you’re sleeping in tents, carried and pitched each day by your climbing crew.
What to expect:
- Two-person mountaineering tents, set up fresh at each camp by your Sherpa team
- A shared dining/kitchen tent where the crew cooks and serves meals — this becomes the social hub of camp life at this altitude
- No showers, no charging points, no real comforts beyond what you and your crew carry in
- Genuinely cold nights, especially at High Camp (5,700m), where a good four-season sleeping bag rated to around -20°C isn’t optional — it’s essential
- A stripped-back rhythm: eat, hydrate, rest, sleep early, wake before dawn — everything oriented around conserving energy for the climb ahead
There’s a particular kind of simplicity to these nights. No electricity, no distractions, just the sound of wind against canvas and the quiet routine of a well-run climbing camp. It’s basic by design — every extra comfort left behind is one less thing your crew has to carry up the mountain.
The Overall Accommodation Details
Put together, the accommodation on Mera Peak tells its own version of the trek’s story:
- Warm and social in the lower valleys, where teahouse life is as much about community as shelter
- Sparse and practical in the mid-altitude villages, where comfort quietly gives way to function
- Stripped down to essentials at the high camps, where a tent, a sleeping bag, and a hot meal are genuinely all you need
None of it is luxurious, and that’s rather the point. Each night gets simpler as the mountain gets closer, and by the time you’re zipped into a tent at 5,700 meters the night before summit day, the lack of comfort barely registers. You’re focused on one thing only, and the accommodation, in its own quiet way, has been preparing you for that the whole way up.
What to Pack for Your Mera Peak Summit 10 Days with Helicopter Return?
Here’s the honest truth about packing for Mera Peak. You’ll go from sweating through rhododendron forest on Day 1 to standing on a glacier in sub-zero wind by Day 9. Few treks in Nepal demand this much range from your kit in such a short window, so it’s worth taking the packing list seriously rather than throwing things in a bag the last night before your flight.
Your porters will carry your duffel, which is a blessing, but don’t mistake that for permission to overpack. The climbers who move best on this mountain are the ones who packed with intention, not the ones who brought everything “just in case.”
Dressing for the Upper Body
Think in layers, because you’ll be adding and shedding them constantly. Start with a good moisture-wicking base layer — this is the piece touching your skin all day, so it needs to pull sweat away rather than trap it. Over that, a fleece or light down mid-layer handles the general cold, while a proper waterproof shell keeps wind and rain at bay when the weather turns, which it will, at some point, without warning.
A softshell jacket earns its place too — lighter and more breathable than your hard shell, ideal for the active trekking days when you’re moving fast and generating heat. Once you’re on the mountain proper, you’ll need a climbing harness and helmet for the fixed-rope sections, along with two pairs of gloves — a thin liner pair for dexterity and a heavier insulated pair for when the wind picks up near the summit. Don’t skip the buff or neck gaiter; it’s a small thing that makes a real difference against wind-burn. And bring both sunglasses and goggles — your eyes need UV protection lower down and full snow-glare protection once you’re above the snowline.
Dressing for the Lower Body
The same layering logic applies below the waist. Moisture-wicking base layers, an insulated mid-layer for warmth, and waterproof shell pants for the exposed, weather-hit sections of the route. A lighter softshell pair works well for the earlier, forested trekking days when you don’t need full protection.
Your boots matter more here than almost any other piece of gear. You’ll want proper mountaineering boots — insulated, sturdy, and compatible with crampons (B2 boots paired with C2 crampons is the standard setup for Mera Peak). Gaiters keep snow out of your boots on the glacier sections, and don’t underestimate your socks — a thin liner sock under a thick, warm mountaineering sock prevents blisters and keeps your feet properly insulated when it matters most.
Complete Gear for Mera Peak Summit with Helicopter Return
A few items aren’t clothing, but they’ll matter just as much on Mera Peak summit day. A sturdy, well-fitted backpack to carry your daily essentials. A sleeping bag rated down to around -20°C — High Camp at 5,700 meters is genuinely cold, and this isn’t a place to compromise. Trekking poles for stability across both trail and glacier. A reliable headlamp with spare batteries, since your summit push begins well before sunrise. Insulated water bottles, because standard ones will freeze. High-SPF sunscreen, since the sun at altitude is far more intense than it feels. A basic first-aid kit with whatever personal medications you need. And a stash of energy bars or nuts to keep you fueled when appetite fades at altitude, which it often does.
What You Don’t Need to Buy for Mera Peak Summit by Helicopter?
Here’s some good news: not everything on this list needs to come from your own closet. Most operators include a sleeping bag, down jacket, duffel bag, and trekking poles as part of the package. Yours to use for the trip and hand back at the end. All the serious technical climbing hardware, fixed ropes, ice screws, and snow bars are supplied by your climbing crew. And if you don’t want to invest in mountaineering boots and crampons for a single trip, both can usually be rented in Kathmandu or right in Khare before the climb begins.
A Few Things Worth Knowing Before Mera Peak Summit
Layer smart rather than heavy. Three good layers will see you through almost every condition on this route, from forest trail to summit wind. Skip cotton entirely; it holds sweat and loses its warmth the moment it gets damp, which is the last thing you want at altitude. Try everything on before you fly to Lukla. Boots with your actual trekking socks, crampons fitted to those boots, your headlamp switched on and tested because 5,700 meters is not the place to discover a problem. Keep an eye on the roughly 10kg baggage limit for the Lukla flight, and know that most agencies will happily store anything you don’t need on the mountain back in Kathmandu, free of charge, until you return.
Pack well, and the mountain will feel a little less unforgiving. Pack poorly, and even the most non-technical parts of this climb can turn into a genuine struggle.
Altitude Sickness on Mera Peak: What to Watch For and How to Handle It
At 6,461 meters, Mera Peak sits well within the altitude range where your body genuinely struggles and altitude sickness, not the climbing itself, is the single biggest reason attempts don’t reach the summit. Understanding what the symbol of altitude during high-altitude climbs is, and what actually helps, is arguably a more important preparation technique than any piece of gear on your packing list.
Why Altitude Sickness Happens?
As you climb higher, air pressure drops and there’s simply less oxygen available in each breath. Your body needs time to adapt for producing more red blood cells, breathing faster, and adjusting how it uses oxygen. Altitude sickness, medically known as Acute Mountain Sickness (AMS), happens when you climb faster than your body can adjust. On the Mera Peak route, this risk becomes real from around Khare (5,000m) onward, and peaks during the final push from High Camp to the summit at 6,461m.
How to Know if you suffer from altitude sickness?
Mild to Moderate AMS
These symptoms are common and, on their own, aren’t usually dangerous, but they’re a signal to pay attention:
- Headache, often the first and most noticeable sign
- Nausea or loss of appetite
- Dizziness or lightheadedness
- Fatigue beyond what the day’s walking would normally explain
- Disturbed or restless sleep
- Mild shortness of breath during exertion
Serious Warning Signs
These indicate the situation is escalating and require immediate action, not waiting to “see if it passes”:
- Severe, worsening headache that doesn’t respond to rest or basic pain relief
- Persistent vomiting
- Confusion, disorientation, or difficulty with coordination (stumbling, unable to walk a straight line)
- Extreme fatigue or difficulty staying awake
- Shortness of breath even at rest
- A dry cough that worsens, or a feeling of fluid/rattling in the chest
- Bluish lips or fingertips
The last two symptom clusters can point toward High Altitude Pulmonary Edema (HAPE) or High Altitude Cerebral Edema (HACE), where fluid builds up in the lungs or brain due to altitude. Both are medical emergencies. They progress quickly, and descent is the only real treatment; every hour of delay increases risk.
Remedies for Altitude Sickness
Descend: The One Remedy That Always Works
If symptoms are moderate or worsening, the single most effective response is to lose altitude. Even descending a few hundred meters can bring meaningful relief. On Mera Peak, this is exactly why the route is built the way it is — Khare’s acclimatization day, and the graduated stops at Base Camp and High Camp, exist specifically to give your body time to adjust before pushing higher. If your guide recommends turning back or descending, that call is coming from experience, not caution for its own sake — take it seriously.
Climb High, Sleep Low
This is the guiding principle behind the entire itinerary’s structure. Short acclimatization hikes above your sleeping altitude — like the ones built into the Khare rest day — help your body adapt to lower oxygen levels during the day, while sleeping lower reduces overnight strain. It’s a slow, deliberate strategy, and it’s one of the best tools against AMS that doesn’t involve medication at all.
Hydration
Altitude increases fluid loss through faster breathing and drier mountain air, and dehydration makes AMS symptoms noticeably worse. Aim for 3–4 liters of water a day on the trail, more on summit day itself. This is also part of why alcohol is best avoided at altitude — it dehydrates you further and can mask early symptoms you’d otherwise notice.
Medication: Acetazolamide (Diamox)
Many climbers use acetazolamide (commonly known by the brand name Diamox) as a preventive measure, typically starting a day or so before reaching higher altitudes. It works by helping your body acclimatize faster, and it’s widely used on treks like this one. That said, it’s a prescription medication with potential side effects (tingling fingers, increased urination, and occasional allergic reactions in some people) — talk to a doctor before your trip, ideally one with travel medicine experience, rather than starting it without guidance.
Basic Symptom Relief
For mild headaches or discomfort, simple pain relief (like paracetamol/ibuprofen) and rest can help you get through a rough patch — but relief of symptoms is not the same as being cured. Masking a headache with medication and continuing to climb higher without addressing the underlying cause is one of the more common and dangerous mistakes trekkers make.
Supplemental Oxygen (Emergency Use)
Some expeditions carry emergency oxygen or a portable hyperbaric bag (like a Gamow bag) for serious cases where immediate descent isn’t possible. These buy time and stabilize a climber, but they’re a bridge to descent and medical care — not a substitute for it.
How Your Guide and Crew Help Manage the Altitude Sickness Risk?
This is one of the real advantages of climbing with an experienced operator rather than attempting Mera Peak independently. On the itinerary outlined earlier, your crew runs daily pulse oximeter checks — measuring blood oxygen saturation and heart rate — specifically to catch early warning signs before they become dangerous. Guides are trained to recognize the difference between manageable mild symptoms and something that needs immediate descent, and a well-organized trip will also have emergency helicopter evacuation arranged as a backup, covered by your travel insurance.
A Few Practical Habits That Help
- Go slow, deliberately. Rushing between camps is one of the most common (and avoidable) causes of AMS.
- Never ignore a worsening headache or persistent nausea. Mild symptoms that are getting worse, not better, are the clearest sign something needs to change.
- Be honest with your guide about how you’re feeling. Pushing through symptoms silently, out of a desire to reach the summit, is exactly how minor AMS turns into a genuine emergency.
- Avoid alcohol and sleeping pills at altitude. Both can suppress breathing and mask symptoms you need to notice.
- Trust the acclimatization schedule. The Khare rest day and the graduated camps aren’t padding — they’re the itinerary’s built-in safety margin.
Altitude sickness isn’t a sign of weakness or poor fitness; even elite athletes get it, because it comes down to how quickly your individual body adapts, not how strong you are. The goal isn’t to avoid all symptoms entirely; mild AMS is common and usually manageable. The goal is to recognize when symptoms are escalating, respond early, and never treat descent as a failure. On a mountain like Mera Peak, the climbers who summit safely are almost always the ones who respected their body’s signals rather than pushing past them.
Mera Peak vs Island Peak: Which Peak Should You Climb?
If your goal is simply to say you’ve stood above 6,400 meters, with the easiest possible technical demands and the quietest possible trail, Mera Peak is the clear choice. If your goal is to genuinely test and build climbing skills the kind that matter if you’re eyeing bigger mountains down the road. Island Peak climbing, despite its lower altitude, is the more honest training ground.
Neither is the “easy” option in absolute terms. Both demand real fitness, real preparation, and real respect for the mountain. The right one for you comes down to a simple question: are you chasing altitude, or are you chasing skill? Answer that honestly, and the choice tends to make itself.
Which Is Harder: Mera Peak or Island Peak?
This is the single most-searched question about these two peaks, and the honest answer is: it depends on what kind of “hard” you mean.
In terms of pure altitude and endurance, Mera Peak is harder. You’ll gain more elevation on the trek itself, spend more days above 5,000m, and face colder, windier conditions on summit day since Mera sits higher and more exposed.
In terms of technical climbing, Island Peak is harder. Despite being 300 meters lower, its final summit push involves a steep ice and rock headwall — sections reaching 45 to 50 degrees — along with a narrow rocky ridge, glacier traverse, and multiple icefalls to navigate.
In terms of the trek to base camp, Mera is harder. The approach into the Hinku Valley involves more elevation gain and loss, rougher trail conditions, and far fewer basic teahouse facilities than the well-developed Everest region route leading to Island Peak’s base camp.
Mera Peak Summit 10 Days Cost Breakdown for (2026/2027)
“How much does it actually cost to climb Mera Peak?” is one of the first questions every prospective climber asks. One of the hardest to get a straight answer to, since prices online range from $1,800 to $5,000 for what looks like the same trip. The truth is, there isn’t one number. There’s a formula: permits, flights, guide and porter fees, accommodation, gear, and a handful of optional extras, all stacked together in different combinations depending on your season, group size, and service level.
What Does Mera Peak Expedition Cost?
A guided Mera Peak expedition typically costs between $1,800 and $4,000 per person, with most comprehensive packages landing between $2,200 and $3,500. The biggest single factor affecting your price is season. In spring, climbs cost significantly more than autumn ones due to permit pricing alone, followed by group size (larger groups mean lower per-person rates) and service tier (budget teahouse-based trips vs. premium all-inclusive packages).
Mera Peak Expedition Permit Costs
Every Mera Peak climber pays into the same set of permits, regardless of which agency they book with. These fees fund conservation, local infrastructure, and the legal framework that makes climbing possible.
NMA Climbing Permit
This is the big one, issued by the Nepal Mountaineering Association, and it’s priced by season:
| Season | NMA Permit Cost (per pax) |
| Spring (March–May) | $250–$350 |
| Autumn (September–November) | $125–$175 |
| Winter (December–February) | $70 |
| Summer/Monsoon (June–August) | $70 |
Why the range? NMA permit pricing was revised in September 2025, pushing spring and autumn rates higher than they’d been previously. Some operators have updated their published pricing to reflect this; others are still quoting older figures. Always confirm the current rate with your agency directly, since this is the single largest swing factor in your total cost — the difference between a spring and winter climb on permit cost alone can be $200–$280 per person.
Additional Permits For Mera Peak Summit
Makalu Barun National Park entry permit: It costs approximately $30–$50 for foreign nationals, required since the Hinku Valley route passes through the park
Khumbu Pasang Lhamu Rural Municipality permit: It is a local area fee, roughly $30 (NPR 3,000)
TIMS card: It costs around $20, standard for most trekking regions in Nepal
Garbage Deposit
A refundable $250 garbage deposit is required as part of the permitting process — you get it back once your team confirms it packed out its waste. A few practical notes: this permit process can only be handled through a licensed Nepali trekking agency (independent climbers cannot apply directly), there are no group discounts on the NMA permit itself, and children under 10 are exempt from the National Park entry fee.
Total permit costs, all-inclusive: It roughly $225–$280 for winter/summer climbs, up to $400+ for a spring expedition once every permit is added together.
Flights: Kathmandu to Lukla and Back
Every Mera Peak Summit 10 Days itinerary starts and ends with a flight to Lukla. In this itinerary, there’s no road access to this part of the Khumbu.
Round-trip Kathmandu (or Ramechhap) to Lukla: historically priced around $340–$400 return, though prices have risen notably in 2026 due to increased aviation fuel costs, with some operators now quoting $500–$580 for the round trip
Departure point: flights sometimes operate out of Ramechhap (Manthali) rather than Kathmandu directly, roughly five hours from the city — your package should include ground transport to whichever airport is currently in use
Weather buffer: Lukla flights are notoriously weather-dependent, with delays common in monsoon and winter. Build in one to two buffer days beyond your core itinerary in case of cancellations
Premium packages: Luxury Mera Peak Summit sometimes replace the Lukla flight with a direct helicopter transfer, which costs significantly more but removes weather-related scheduling risk.
Guide and Porter Fees
Nepal’s regulations require all climbers to be accompanied by a licensed guide. Solo, unguided ascents of Mera Peak aren’t permitted.
Service Typical Daily Rate Notes
| Service | Typical Daily Rate | Notes |
| Licensed climbing guide | $30-$50 /day | Higher for NMA-certified climbing guides vs. standard trekking guides |
| Porter | $20-$30/ day | Typically one porter shared between two climbers |
For a standard 12–15 day itinerary, budget roughly $500–$800 for combined guide and porter services if booking independently. Though in nearly all package deals, this cost is already bundled into your total price rather than billed separately.
Accommodation Costs During Mera Peak Summit
Where you sleep changes a lot along the route, and so does the cost.
Kathmandu hotels: anywhere from $10 to $400+ per night, depending on whether you’re staying in a basic guesthouse or a five-star property
Teahouses (Lukla to Khare): roughly $2–$6 per night for a basic twin-share room — often discounted or free if you’re eating your meals at the same teahouse
Tented camps (Khare, Base Camp, High Camp): no separate nightly charge in most packages — this cost is built into your overall expedition price, since your crew carries and pitches the tents themselves
Budget/self-organized climbers pay these costs individually as they go; guided package climbers have this entirely bundled into the upfront price.
Meals
Teahouse meals (lower villages): roughly $5–$10 per meal if paying independently, generally cheaper the lower in elevation you are
High-altitude meals (Khare and above): noticeably pricier, since ingredients are carried in — expect $8–$15 per meal
Package trips: virtually all guided Mera Peak packages include full board (breakfast, lunch, dinner) throughout the trek as part of the base price
Why Carry Gear When You Can Rent it at the Doorstep of the Mountain?
If you’re planning a Mera Peak climb, one of the most common questions we get from climbers is: should I bring my own technical gear, rent it in Kathmandu, or wait and rent it at Khare? Our answer, in most cases: rent it at Khare — and here’s why it makes more sense than the other two options.
What Makes Khare the Practical Choice for Renting Gear?
1. You’re Not Carrying Heavy Gear for 6+ Days of Trekking
2. It Genuinely Saves You Money
3. Available Right When You Need It
4. It Pairs Naturally with Your Pre-Climb Training
5. Fresher, Better-Maintained Equipment
Renting at Khare (especially through an arranged agency package) is consistently the most economical route, often a fraction of the cost of buying, and comparable to or cheaper than renting the same gear in Kathmandu, without the added hassle of carrying it there.
Access Nepal Tours’ Mera Peak summit is a guided packages already includes sleeping bags, down jackets, water bottles, and duffel bags. The rental question mostly applies to technical items like boots and crampons if you don’t already own them. Renting is almost always the smarter financial choice for a one-time climb.
Travel Insurance
Travel insurance is mandatory and not a place to cut corners. Your policy needs to specifically cover:
- High-altitude trekking up to at least 6,500 meters (Mera Peak’s summit is 6,461–6,476m)
- Emergency helicopter evacuation
Expect to budget $100–$250 depending on your provider, trip length, and coverage level. Standard travel insurance policies frequently exclude high-altitude activity above 6,000m by default, so double-check the fine print rather than assuming a general policy covers you.
Visa Fees
Nepal’s tourist visa, available on arrival at Kathmandu’s airport:
- 15 days: $30
- 30 days: $50
- 90 days: $125
Tips and Personal Expenses
Tipping your guide, porters, and driver is customary and genuinely expected in Nepal’s trekking industry, even though it’s rarely built into the advertised package price. Budget:
Guide tip: roughly $10–$15/day, often given as a lump sum at trip’s end
Porter tip: roughly $6–$10/day per porter
Personal spending: hot showers, device charging, snacks, and drinks along the trail, which typically cost extra at teahouses
A realistic personal expenses and tipping budget is $300–$500 for the full trip.
Complete Cost Breakdown: What a Full Budget Actually Looks Like
| Category | Estimated Cost |
| NMA + additional permits | $225–$400 |
| Garbage deposit (refundable) | $250 |
| Kathmandu–Lukla flights | $340–$580 |
| Guide and porter fees | $500–$800 (often bundled) |
| Accommodation (Kathmandu + trail) | Bundled in most packages |
| Meals (trek) | Bundled in most packages |
| Gear rental | $100–$200 |
| Travel insurance | $100–$250 |
| Visa | $30–$125 |
| Tips and personal expenses | $300–$500 |
| Total (self-organized, itemized) | ~$1,800–$3,100 |
| Typical guided package (all-inclusive) | $2,200–$3,500 |
| Premium/luxury package | $3,500–$5,000+ |
What factor causes Mera Peak Summit Price Fluctations?
1. Season Is the Single Biggest Swing Factor
A spring climb can cost $200–$300 more per person than an autumn one on permits alone, before factoring in higher demand pricing across flights and accommodation during peak season. Winter and monsoon climbs are cheapest on paper, but come with added weather and safety tradeoffs that make them unsuitable for less experienced climbers.
2. Group Size Changes Your Per-Person Rate
Guided packages typically offer meaningful discounts as group size increases — a solo climber often pays a single-supplement premium, while joining an existing group departure is usually the most cost-effective way to book.
3. Itinerary Length
Shorter itineraries (10-day versions using a helicopter shuttle out) trade a higher day-rate for fewer total days, while longer 17–22 day itineraries spread the fixed costs (permits, flights) across more trekking days, often landing at a similar or slightly lower total.
4. Service Provided by the Company
Budget packages (shared teahouse rooms, no meals included, self-funded extras) can come in as low as $1,100–$1,800, while premium tiers with helicopter transport, private guiding, and better accommodation push well past $4,000.
How can you save expenses without cutting safety corners?
- Climb in autumn rather than spring — the permit savings alone are substantial, and conditions are still excellent
- Join an existing group departure rather than booking a private climb
- Rent technical gear (boots, crampons) rather than buying items you may only use once
- Book with a licensed local Nepali agency rather than an international reseller, since resellers typically add a significant margin on top of the same ground services
- Avoid cutting corners on insurance or guide/porter services — this is not the place to save money, since it directly affects your safety margin at altitude
Mera Peak Summit FAQs
Do I need climbing experience for Mera Peak?
No, prior technical climbing experience is required. Mera Peak is classified as a trekking peak by the Nepal Mountaineering Association, meaning it’s designed to be accessible to climbers without a mountaineering background. That said, you do need to be comfortable using crampons, an ice axe, a harness, and fixed ropes near the summit — skills that most reputable operators teach through a pre-climb training session, usually held at or near Khare before the summit push. Basic prior trekking experience at altitude is genuinely helpful, even if it’s not a strict requirement.
Can beginners climb Mera Peak?
Is Mera Peak harder than Kilimanjaro?
What grade is Mera Peak, technically?
How high is Mera Peak, exactly?
How long does it take to climb Mera Peak?
What is the success rate for summiting Mera Peak?
How cold does it get on Mera Peak?
What's the best time of year to climb Mera Peak?
Do I need to acclimatize before attempting Mera Peak?
How much does it cost to climb Mera Peak?
What permits do I need for Mera Peak?
Can I climb Mera Peak without a guide?
Is oxygen used on Mera Peak?
Can Mera Peak be combined with other treks or peaks?
Awards and Achievements
Access Nepal Tour and Treks has been recognized with TripAdvisor’s prestigious Travelers’ Choice Award for multiple consecutive years, reflecting our unwavering commitment to quality and clients’ satisfaction.