
How Difficult is Jhomolhari Trek?
- Information
- By accessnepaltour
Nestled in the pristine landscapes of Bhutan, the Jhomolhari Trek stands as a testament to the allure of the Himalayas. How difficult is Jhomolhari Trek? It’s a pilgrimage to the sacred Mount Jhomolhari, revered by the local Bhutanese as the “abode of the goddess.” As trekkers embark on this journey, they find themselves wrapped in a tapestry of cultural richness and natural splendor.
The path to Jhomolhari is as challenging as it is beautiful. It weaves through remote valleys, dense forests, and high alpine meadows, each step bringing its own set of trials and rewards. The trek is not merely a physical endeavor but a spiritual experience, offering a chance to disconnect from the chaos of modern life and reconnect with nature’s rhythms.
In this blog, we delve into the intricacies of the Jhomolhari Trek. We’ll assess the difficulty of the Jhomolhari trek, dissect the elements that contribute to its challenging nature, and provide insights to help potential trekkers prepare for the adventure ahead.
From the preparation required to the triumph of completion, we aim to equip you with all the knowledge needed to navigate this majestic trek successfully.
How difficult is Jhomolhari Trek? What Makes Jhomolhari Trek Challenging?
The Jhomolhari Trek is renowned for its breathtaking vistas, but it’s the challenge that calls to the adventurous spirit. Here’s what makes Jhomolhari trek challenging and is considered one of the most demanding:
- Altitude and Acclimatization: The trek reaches altitudes over 4,900 meters, where the air is thin, and the risk of altitude sickness is real. Acclimatizing is crucial, and the body’s response to high elevations can be unpredictable.
- Distance and Duration: Spanning approximately 115 kilometers, the trek demands endurance. Over the course of 10 days, trekkers navigate through varied terrains, pushing their limits each day.
- Terrain and Weather: From rocky trails to steep ascents, the terrain is unforgiving. The weather in the mountains is notoriously fickle, with the potential for sudden changes that can impact visibility and safety.
Understanding these challenges is key to a successful trek. Preparation, both mental and physical, is essential, as is respect for the mountain’s might. In the next section, we’ll explore how to prepare for this incredible journey.
Certainly! Let’s elaborate on each day of the Jhomolhari Trek with more details, focusing on the difficulty of the Jhomolhari trek, distance, altitude gain, and the unique aspects of each day’s journey.
Safety Measures and Emergency Protocols for Jhomolhari Trek
The Jhomolhari Trek’s remote nature demands a robust safety plan. Here’s what every trekker should know:
- Trekking with a Guide: Navigating the wilderness requires local knowledge. Guides are not only familiar with the trails but also trained in emergency response.
- Emergency Evacuation: Know the procedures for evacuation in case of medical emergencies. Helicopter rescues are available, but insurance is a must.
- Health and Hygiene: Maintain personal hygiene to prevent illness. Drink purified water and be cautious with food consumption.
- Respect the Environment: Stay on marked trails to preserve the delicate ecosystem. Carry out all waste to keep the trails clean.
By adhering to these protocols, trekkers can ensure their safety and the preservation of the environment for future adventurers.
Day-by-Day Breakdown of the Jhomolhari Trek
1: Arrival in Paro
- Activities: Land in the tranquil Paro Valley and transfer to your hotel. Use this day to acclimatize to the elevation and recover from your journey.
- Difficulty: Easy; a day for rest and acclimatization.
- Altitude: 2,250m, allowing your body to gently adjust to the altitude.
2: Paro Sightseeing and Trek Preparation
- Activities: Explore Paro’s rich heritage with visits to the Rinpung Dzong and the iconic Tiger’s Nest Monastery. Prepare your gear and mind for the trek.
- Difficulty: Easy; light walking to keep active and engaged.
- Altitude: No significant change, staying within Paro’s elevation range.
3: Drive to Drukyel Dzong; Trek to Shana Zampa
- Distance: Approximately 17km.
- Difficulty: Moderate; the first day of trekking introduces you to the trail’s conditions and begins the gradual ascent.
- Altitude Gain: From 2,580m at Drukyel Dzong to 2,900m at Shana Zampa.
- Terrain: The path takes you through agricultural fields and pine forests, with the Thimphu River accompanying you.
4: Shana Zampa to Soi Thangthanka
- Distance: Roughly 22km.
- Difficulty: Challenging; a longer trek with a steady climb that tests endurance.
- Altitude Gain: Ascend to 3,800m, with increased chances of feeling the effects of altitude.
- Terrain: The trail narrows and winds through rhododendrons and blue pine forests, offering glimpses of high mountain ridges.
5: Soi Thangthanka to Jangothang
- Distance: About 19km.
- Difficulty: Challenging; continued ascent with potential for altitude sickness symptoms to present.
- Altitude Gain: Reach 4,050m, approaching the treeline and entering the high mountain zone.
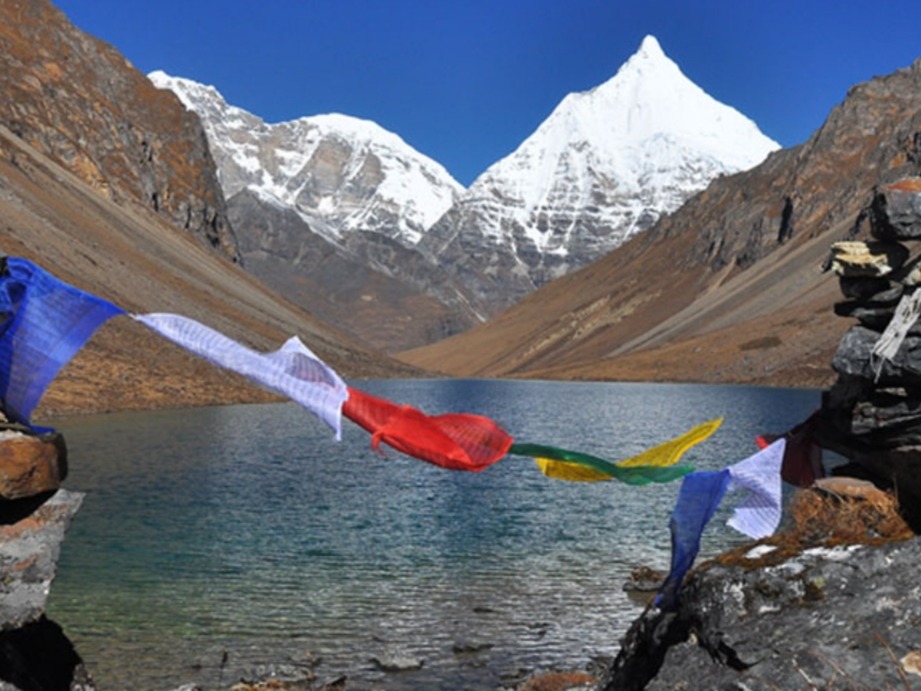
- Terrain: The valley widens, and the majestic Jhomolhari peak becomes visible, serving as a stunning backdrop to the day’s trek.
6: Rest Day in Jangothang
- Activities: A day for acclimatization, with optional hikes to nearby peaks or lakes.
- Difficulty: Variable; choose your activity level based on how you’re feeling.
- Altitude: 4,050m; a crucial day for your body to adapt to high altitude.
7: Jangothang to Lingshi
- Distance: Approximately 18km.
- Difficulty: High; crossing the first high pass, Nyile La, at 4,890m.
- Altitude Gain: A slight descent to 3,850m after the pass.
- Terrain: The landscape shifts to a more barren, rocky environment, with the chance to spot blue sheep and other wildlife.
8: Lingshi to Sodhu
- Distance: Around 22km.
- Difficulty: Very high; one of the longest and most strenuous days with multiple ascents and descents.
- Altitude Gain: Climb to 4,100m, navigating through high altitude pastures and stark landscapes.
- Terrain: Traverse remote areas with little sign of human habitation, save for the occasional nomadic herder’s camp.
9: Sodhu to Barshong
- Distance: Roughly 16km.
- Difficulty: Moderate to high; descending through forests with several ups and downs along the way.
- Altitude Gain: Descend to 3,600m, providing some relief from the high altitude.
- Terrain: The trail meanders through dense rhododendron forests, with waterfalls and streams adding to the day’s beauty.
10: Barshong to Dolam Kencho
- Distance: About 15km.
- Difficulty: Moderate; a shorter day with a mix of ascents and descents.
- Altitude Gain: Maintain an average altitude of 3,600m.
- Terrain: Continue through forested areas with the chance to see traditional Bhutanese farmhouses.
11: Dolam Kencho to Dodena
- Distance: Approximately 8km.
- Difficulty: Easy to moderate; the final descent with a sense of accomplishment.
- Altitude Gain: Descend to 2,600m, marking the end of the high-altitude experience.
- Terrain: The trail descends steeply through bamboo and pine forests before reaching the road head at Dodena.
12: Sightseeing Tour of Thimphu and Drive to Paro
- Activities: Discover Thimphu, the capital of Bhutan, with visits to the Tashichho Dzong and the Buddha Dordenma statue.
- Difficulty: Easy; a relaxing day to reflect on the trek and enjoy the comforts of civilization.
- Altitude: 2,320m in Thimphu, gradually returning to Paro’s altitude.
13: Depart Paro
- Activities: Departure day, saying farewell to the Land of the Thunder Dragon with memories to last a lifetime.
- Difficulty: N/A.
- Altitude: 2,250m, Paro’s elevation.
This detailed breakdown provides a comprehensive view of each day’s trek, highlighting the Jhomolhari trek difficulty and unique experiences trekkers will encounter. It’s designed to help readers fully prepare for the adventure that awaits them on the Jhomolhari Trek.
How to Overcome the Difficulty of the Jhomolhari Trek? Preparation Tips for the Jhomolhari Trek
The difficulty of the Jhomolhari trek can be overcomed by proper preparation is the key to conquering the Jhomolhari Trek. Here’s how you can gear up for this high-altitude adventure:
- Physical Training: Start with cardiovascular exercises to build stamina. Include hiking, running, and cycling in your routine. Strength training, especially for legs and core, will help you tackle the steep climbs.
- Gear and Supplies: Invest in quality trekking boots, a warm sleeping bag, and appropriate clothing for cold and unpredictable weather. Don’t forget essentials like a first-aid kit, water purification tablets, and energy snacks.
- Acclimatization Plan: Spend a few days at higher altitudes before the trek to acclimate your body. Learn the signs of altitude sickness and understand when to rest or seek help.
Conclusion
In this blog, we’ve covered the Jhomolhari trek difficulty, and all we can say is that it is considered a moderately challenging adventure. To successfully complete the trekking in this region, you need to have good physical fitness as well as mental endurance. The difficulty of the Jhomolhari trek can be eradicated with the right preparation and mindset.

Five Himalayan Festivals in Nepal You Must Experience
Prev
Best Places for White Water Rafting in Nepal
NextAwards and Achievements
Access Nepal Tour and Treks has been recognized with TripAdvisor’s prestigious Travelers’ Choice Award for multiple consecutive years, reflecting our unwavering commitment to quality and clients’ satisfaction.


Leave Your Comment